Gluten-Free 3

It’s amazing how, when we heard “go gluten-free,” I thought “I absolutely can’t give up bread”. But then I whipped into gear to start looking at the options. I bought the ingredients to start baking without gluten and cruised the internet for advice about why we shouldn’t be consuming it.

Basically the advice, in a nutshell, is that if you are sensitive, you should stay away from gluten. However, if not diagnosed with Celiac disease or an actual allergy, then it’s not critical to buy oatmeal that is certified gluten-free or to avoid anything that might have even come into contact with wheat. The anecdotal take is that you should stay away from gluten no matter what because it is inflammatory. The medical advice is that it hasn’t been proven to be inflammatory and it’s fine to eat bread. The most important piece of advice to remember is to read your own body’s response.

Now that we’re several weeks into a gluten-free diet, we realize that if we have to continue this way, it’s not all that hard. We’re waiting on blood tests to see if gluten is causing the digestive issues, so will take all the advice with a grain of salt until we know the final diagnosis.

Meanwhile, commercial gluten-free hamburger buns, bagels, bread and wraps are perfectly edible. Okay, the bread doesn’t taste quite like a crusty sourdough loaf, but it’s certainly okay on a sandwich. And I like to pride myself on being adaptable. No adolescent pouting here.

I’ve had several failed loaves of bread using my own mix, so my advice is that, even though expensive, buy the ready-made baking and bread mixes. Try several and figure out which one you like the best. And enjoy your biscuits, pancakes and avocado toast!
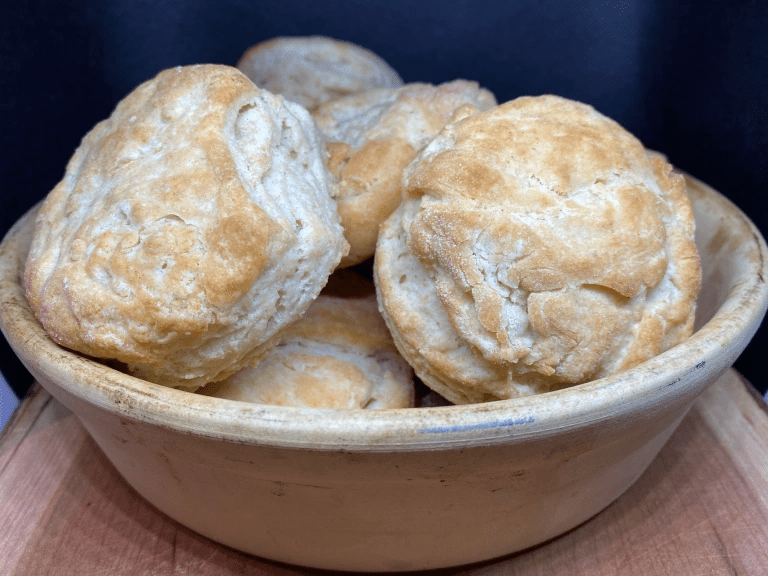
2 c. gluten-free baking mix (Bob’s Red MIll, KIng Arthur, Pillsbury)
1 T. baking powder
½ t. salt
¼ t. baking soda
6 T. butter
1 c. buttermilk

Blend dry the dry ingredients. Cut in butter with two forks or a pastry cutter until it resembles a coarse meal. Add buttermilk and mix lightly, just enough to incorporate the ingredients. Be sure not to overmix. Pat into a loose ball, turn onto a floured board and roll out to about ½” thick. Cut with a biscuit cutter and place on an ungreased cookie sheet covered with parchment paper or a silicone mat. Brush the tops with milk for browning. Bake at 400 for 15-20 minutes.

Gluten-free, take 2

So, on with our gluten-free journey. After perusing the gluten-free products aisle, we’ve (my husband and I) had a few revelations, a few disappointments, and a whole new appreciation for this realm. And especially an appreciation for those people for whom gluten is a serious allergen with drastic symptoms when they consume it.

We’ve tried a couple of commercial breads, some delicious and some that taste like cardboard. The biggest lesson, however, is the cost. So, I’m determined to figure out how to make good artisan whole-grain bread that is gluten-free. Without wheat flour. So far, the only gluten-free flour mixes I’ve found are not necessarily whole grain because they are based on white rice flour. But they often contain pea flour, maybe corn flour and buckwheat flour as a base. Believe it or not, buckwheat has no gluten.

We’ve also perused the internet and many, many websites purport to make gluten-free products that taste good. I will continue to do the research and experimentation. The good news is that now that we’re making ourselves aware of gluten as an ingredient, it’s becoming second nature to check before we purchase or use anything.

We’ve eaten out several times since starting this journey, and most restaurants offer gluten-free products as a regular part of their menus. The downside is that the establishments usually charge extra for gluten-free bread. And we were surprised recently at a restaurant that had a whole gluten-free menu. The burger came with baked sweet potato fries, but there was a $2.00 upcharge to substitute regular fries (they couldn’t guarantee that the fries weren’t cooked adjacent to a product containing wheat such as battered fish or chicken).

I recently made a birthday carrot cake for a friend and we were both a little disappointed that we couldn’t have any because we both love carrot cake. But, it prompted a late-night session with the internet and a gluten-free brownie recipe. The brownies were good – chewy and chocolaty, although they did taste a little different than our favorite Katherine Hepburn brownie recipe (see below).

I find myself going to the King Arthur site regularly. So far, their gluten-free recipes seem somewhat reliable (I really don’t get any compensation – I just feel it’s the best resource so far). They do have their own line of products as well, so when you are looking you often find them lined up next to Bob’s Red Mill products. It takes some of the guesswork out of the process. We bought a cornbread mix and it produced good cornbread. A little heavier than my grandmother’s recipe, but still good.

But I’m a cook-from-scratch sort of cook, so I’m lining up the individual ingredients needed and will start working on my own mixes. I’ll keep you posted.

Katherine Hepburn’s Brownies (borrowed from PBS History)

½ cup cocoa or 2 squares (2 oz.) unsweetened baker’s chocolate
1 stick unsalted butter
1 c. sugar
2 eggs
¼ c. gluten-free flour
1 t. vanilla
¼ t. (or more) chile flakes
Pinch of salt
1 cup roughly chopped walnuts or pecans

Melt butter with the cocoa or chocolate together in a heavy saucepan over medium-low, whisking constantly till blended. Remove from heat and stir in the sugar. Whisk in the eggs and vanilla. Stir in flour, salt and walnuts. Mix well. Pour into a well-buttered 8-inch square baking pan. Bake at 325 degrees for about 40 minutes till a toothpick inserted in the center comes out clean. Cool completely and cut into squares. The fudgy goodness is hard to slice so use a sharp knife and spatula.

Gluten-free diet

I’m going to take you on a journey with me. Out of medical necessity, my house is going on a gluten-free diet. I’ve always shied away from gluten-free products because they just weren’t necessary and I assumed they weren’t as good as those made with wheat. Happily, I’ve been redirected.

I’ve spent a lot of years cooking with flour – from making a roux for creamy pasta to my grandmother’s traditional holiday cookies to soy sauce in stir-fries (yep, soy sauce has wheat in it) to good old bread baking and even making a sandwich.

I do so many things by rote and from scratch, that I now have to stop and think through any recipe and figure out substitutes. I asked a gluten-free friend which commercial breads taste best and her response was, “I don’t know. They’re all pretty bad.” However, until I can figure out how to make my own substitutions, I’m reliant on commercial breads and baking mixes. And they are pretty expensive.

But they certainly don’t deserve the bad reputation that so many have. I can’t say they’re homemade good yet, but at least there’s hope. Gluten-free products have come a very long way in the past 20 years. I made waffles from a gluten-free baking mix recently and they were actually as good as our usual homemade ones. Buttermilk and baking powder seem to work equally well with any type of flour. Most restaurants offer gluten-free bread and bun options so it’s also possible to eat intelligently when out without having to bring your own bread.

So, as I bounce along this road, I’ll share what I find as far as different flours to use, how to make leavening work without gluten, and which commercial products are the best. Keep in mind that if I mention a brand, I’m not selling or getting any compensation. It’s simply something I’ve tried that is readily on the market.

Here goes!

I purchased an all-purpose baking mix (King Arthur) that already has baking powder and xanthum gum in it. Certainly not intended for bread baking, but the waffles were delicious. I’d really like more of a whole grain mix so I’ll next try just the plain alternative flours to make my own waffle and pancake mix.

2 T. vegetable oil or melted butter
1 large egg
1 T. sugar (optional)
½ t. vanilla extract
1 c. baking mix
½ t. baking powder (the mix already has some in it but they suggested more)
dash salt
1 ½ c. milk

Mix and let stand 10 minutes. Pour onto hot waffle iron or pancake griddle.