Delicious Whole Grains and Seeds

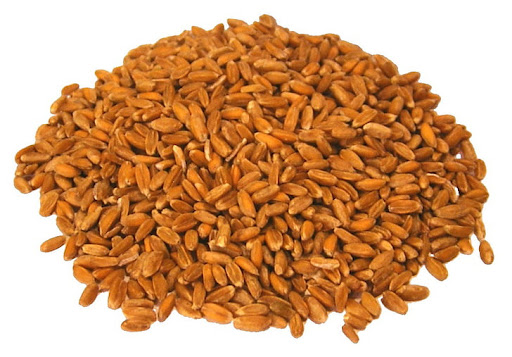
I’ve accidentally found a treasure. I love oatmeal for breakfast, and I’ve found a way to increase its nutritional value manyfold. On a recent cold rainy day, I hauled out the instapot. I cooked barley, quinoa and steel-cut oats separately and then mixed them together for an absolutely delicious whole-grain breakfast cereal. You could use just about any grain – farro, kamut, wheat berries, rice. Just cook them separately. For extra flavor, cook them in broth instead of water.

The best part is that I made enough to freeze in individual portions to use whenever I want a boost of whole grains. Whole grains take a bit of time to cook, so often they’re not the first things we grab for a meal. But the instapot makes short work of them, and since I cooked them when I wasn’t in the middle of meal prep, it wasn’t a chore and I could do other things while waiting for them to finish.

My favorite way to have hot breakfast cereal is savory – with plenty of black pepper and grated cheese. Adding spinach, avocado, carrots or any other vegetables I have in the crisper makes it even more nutritious. It’s easy to make them sweet with maple syrup, dried cranberries, toasted almonds, and even a few cubes of candied ginger.

These grains are chock full of fiber and vitamins, so adding them to almost any dish gives you a double shot of health. Mix them in with sauteed mushrooms and broccoli, add to pasta alfredo, or sprinkle them on a fresh salad.

Recipe

Here are the grain-to-water ratios and the cooking times in the instapot. No need to soak anything. Set the pressure to high and after the grains finish pressure cooking, allow a natural release so they steam a bit longer. If they are still too chewy for your taste, repeat the process and only pressure cook for a few minutes.

  • Quinoa 1 cup grain to 1 ¼ cups water 3 minutes
  • Pearled barley 1cup grain to 2 cups water 20 minutes
  • Steel cut oats 1cup grain to 3 cups water 4 minutes
  • Farro 1 cup grain to 2 cups water 10 minutes
  • Kamut 1cup grain to 2 cups water 30 minutes
  • Wheat berries 1cup grain to 4 cups water 30 minutes
  • Millet 1cup grain to 1 ½ cups water 9 minutes
  • White rice 1cup grain to 1 cup water (rinse well first) 4 minutes
  • Teff 1 cup grain to 2 cups water 2-3 minutes
  • Amaranth 1 cup grain to 2 cups water 5 minutes
  • Brown rice 1 cup grain to 1 cup water 20 minutes
  • Buckwheat 1 cup grain to 1 ¾ cups water 6 minutes

Heirlooms and Saving Seeds

Heirloom tomatoes are abundant now

Heirloom vegetables give us a sweet connection to the past, and many people believe that these vegetables have the closest flavor to our childhood memories of true vegetable taste. Heirlooms come from seed that has been handed down for generations. They get their start when a gardener hand-selects for a special trait.

Open Pollinated, Self Pollinated

Heirloom vegetables are open-pollinated, which means they’re pollinated by insects or wind without human intervention. As long as pollen is not shared between different varieties within the same species, then the seed will produce a plant that resembles the plant from which it came and remain true-to-type year after year.

If you decide that you want to save seed from heirloom plants, you need to understand whether the variety is self-pollinated or will cross-pollinate. Cross-pollination may mean that you end up with plants that don’t resemble the plant from which you saved seed and may not even be edible. This is particularly true with cucumbers, squash and melons.

Hybrid Seeds

Dwarf Grey snowpeas are heirloom peas

The “opposite” of an open-pollinated plant is a hybrid which is created by human intervention. Designated as an F1 hybrid, seeds are produced by seed companies by carefully controlling cross-pollination of two varieties with specific traits. It’s important to note that they often don’t “come true” from saved seed. In other words, the seeds you collect from a hybrid may produce plants that are like either parent that was used in the cross or some combination of traits. Some hybrids produce sterile seeds.

Save Seeds Now

Start making plans to save seeds now while the garden is still in full production. Peas, green beans, tomatoes, eggplant, peppers are all self-pollinating and fairly easy to save.

Tomatoes

For soft fruits, such as tomatoes, eggplant, and peppers (yes, they are botanically fruits), let the fruit ripen to almost overripe but not to the point of being rotten.

For tomatoes, scrape out the seedy pulp and discard the rest of the fruit (make bruschetta!). Put seeds and pulp in a covered jar with some water and let it sit a few days to ferment. Fermentation lets bacteria kill any seed borne diseases. Shake the jar a couple of times a day.

After a couple of days, the good seeds will have sunk to the bottom and the bad seeds and pulp will be floating. Pour off the water and pulp carefully, trying not to disturb the seeds on the bottom. Then dump the seeds into a fine strainer and rinse them well. Spread the damp seeds on a tray or screen to dry. If you dry on paper towels or newspaper, they will be hard to remove without damage.

Peppers and Eggplants

For peppers and eggplant, simply remove the seeds from the pulp and wash the seeds thoroughly. Spread the seeds to dry.

Sweet and chili peppers for seed saving

Beans and Peas

Heirloom beans

Beans and peas are most easily left on the vine to dry. When dry, break or split the pods to release the seeds. Spread them on a screen or tray to dry completely.

Storage

Keep your dry seeds dry

Once your seeds are dry, store in an airtight container to prevent reabsorbing moisture from the air. Label immediately. Keep seeds dry and cool and between 32° and 41°F. Canning jars or plastic containers make great storage containers, and you can add a silica-gel desiccant to keep them completely dry.