Fruit crisp

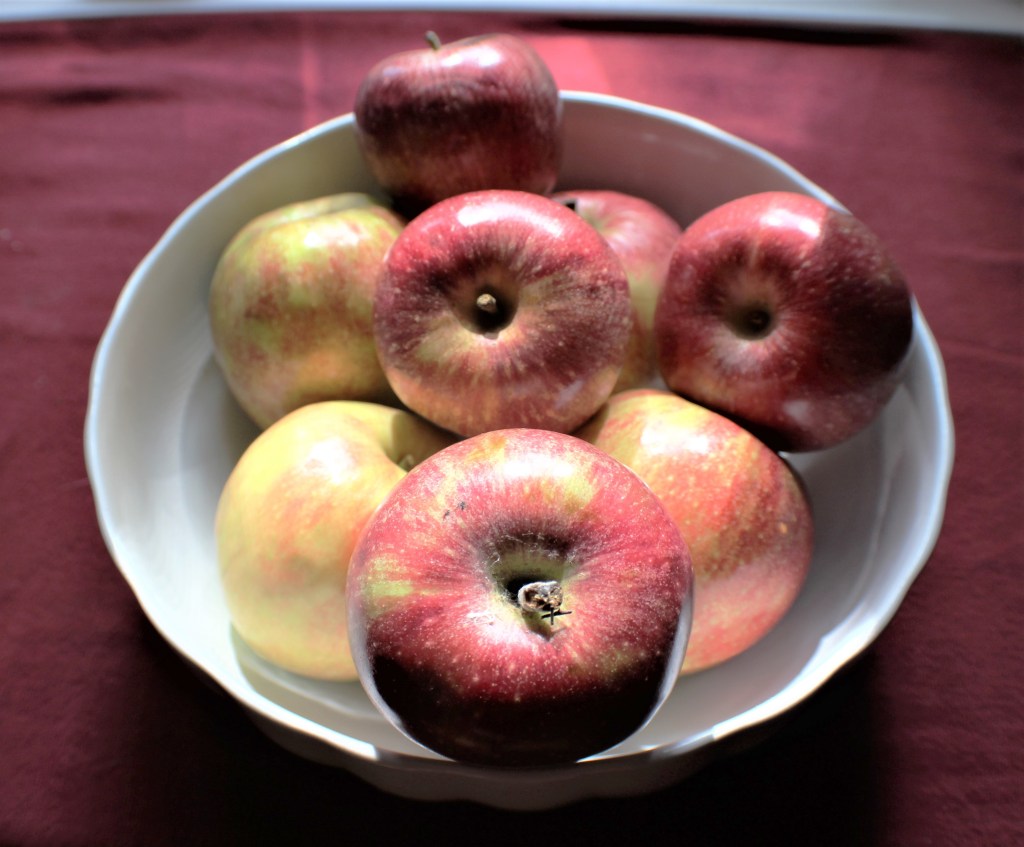
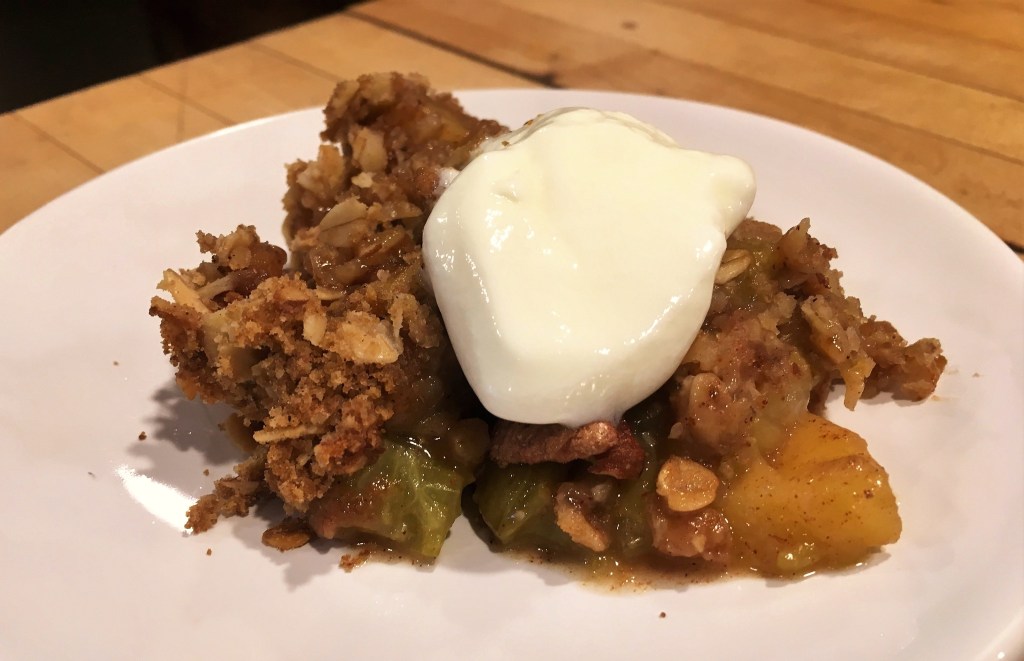
Nothing quite says autumn like the scent of cinnamon-laced baking apples wafting through the house on a cool afternoon. Now I love apple pie, but it is much more of a commitment to time and expertise. I can pull off an apple crisp in less than half an hour, without fear of crust failure which is one of my regular mishaps. 

Apple rhubarb crisp

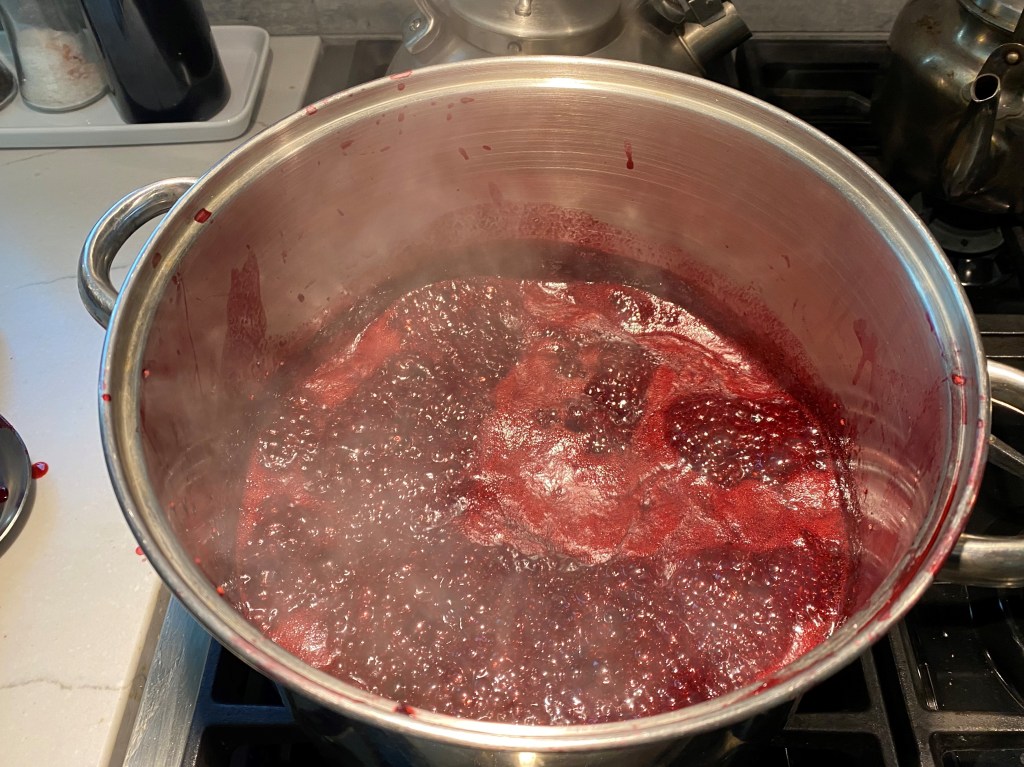
I tend to fall back on fruit crisps frequently since they are simple, fresh desserts that can be made with any type of fruit. All you need to do is adjust the cooking time depending on the firmness of the fruit. In a pinch, frozen fruits work just fine (this is one of my main reasons for freezing peaches in season). For the crisp, use your imagination and just about any combination of oats, flour, nuts if you like, and cinnamon. Make it stick together with juice, butter or coconut oil, your choice. I’ve recently tried using ready-made granola which makes the process even simpler and faster. And crunchier. 

Easy-to-make crisp

To make a quick crisp that serves two, simply fill a small baking dish with two to four cups of prepared fruit, sweeten if necessary, and top with a crumbly crust (below). Bake about half an hour (45 minutes for apples and pears) at 350 degrees. 

Peaches, blackberries and raspberries for crisp

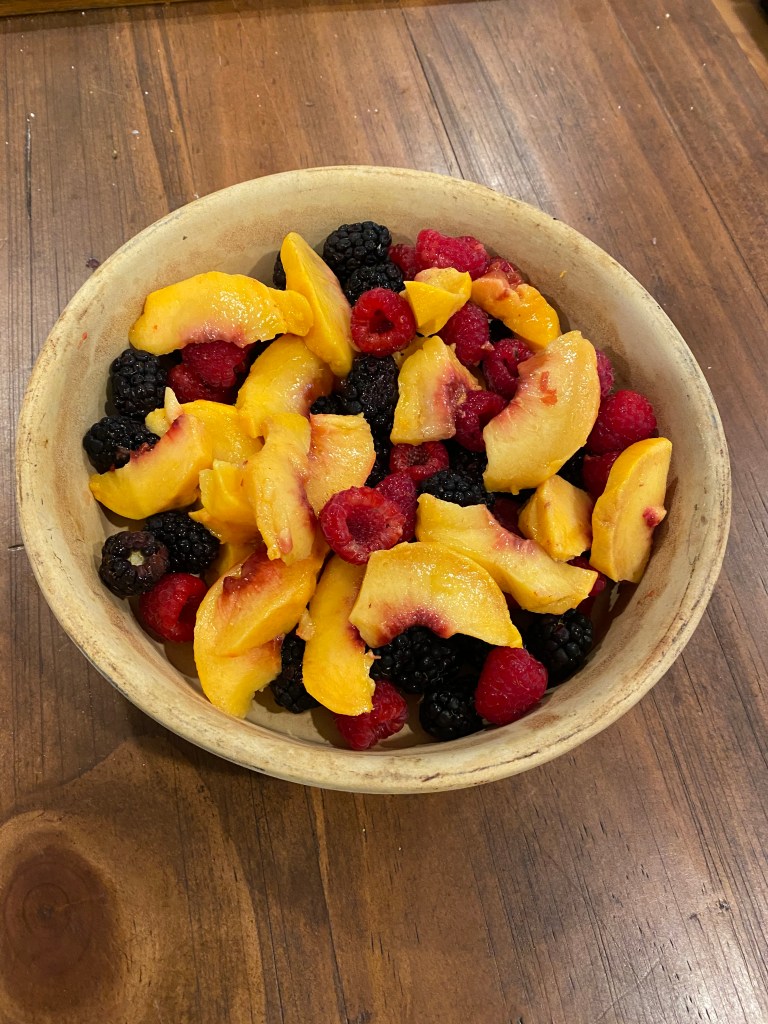
Some lovely fruit combinations: 

Peaches and blackberries or raspberries

Blueberries and plums

Apples and cranberries

Rhubarb and strawberries

Crunchy toppings

1 c. regular oatmeal

½  c. brown sugar

½ c. flour

1 t. cinnamon 

¼ c. defrosted apple juice concentrate 

Mix the first four ingredients; drizzle apple juice into the oatmeal mixture. Stir until the mixture forms small clumps. Spread mixture on top of the fruit and bake 30 minutes at 350. 

Another topping

⅓ c. chopped toasted walnuts

½ c. flour

½ c. rolled oats

½ c. brown sugar

1 T. granulated sugar

¼ t. cinnamon

¼ t. nutmeg

¼ c. softened butter

Mix dry ingredients well and then cut in the butter until it forms small clumps. Continue as above. 

Blackberry jam

I collected blackberries along my walking trails late last summer and froze them for use later. Since they are getting ready to bloom this spring, I figured it is time to make jam. 

I do this frequently – collect or purchase fruits when they are ripe in summer and if I don’t have time to make jelly or jam, I will freeze it until I do have the time. It actually makes a wonderful winter project. Not to mention, lovely holiday gifts. 

Freeze summer fruits

Photo by S. Hermann & F. Richter from Pixabay 

It’s important when freezing fruit for jam that it be washed and prepared because you won’t be able to do it once it thaws since it will be very soft. If it is cut, peeled if necessary, and ready for cooking, all you have to do is toss it in the pot, prepare your jars and get busy.

Blackberry jam from wild berries has a flavor that is so much more satisfying than commercially made jam. And, making jam is fairly easy to do once you get past the stigma that it is labor intensive. All it really takes is a bit of patience. 

Pectin or not?

Blackberries have plenty of naturally occurring pectin (so do currants, raspberries and apricots) so you don’t have to add commercial pectin to make your jam jell. In general, jams and jellies made with commercial pectin are more foolproof, but they also require more sugar. 

To seed or not to seed

Wild blackberries can be somewhat seedy, so your jam will be more palatable if you remove some seeds. No, you don’t have to pick them out. If you cook down your berries until they are soft and then run through a food mill, you will remove about half the seeds. If you really want a seedless jam, you’ll need to push the pulp through cheesecloth and you will lose a good bit of pulp in the process. 

Blackberry Jam

8 cups blackberries

4 cups sugar

½ c. water

Place the berries in a large pot and cook over medium-low heat about 20 minutes until the berries are very soft. You can mash them up a bit to help them release their juice. 

Run the berries through a food mill. Measure your pulp, return to the kettle and add the same amount of sugar. Put a ceramic saucer in the freezer (I’ll explain in a minute). Stir and cook over medium heat until the jam thickens. To test for thickening, take a spoonful and drip it onto your frozen saucer. This cools the jam very quickly and you can tell how thick it will be when finished. When it doesn’t run when you tip the saucer, it’s ready. 

Take the jam off the heat, skim off any foam (I like to save this in a jar for my toast – tastes just as good as the jam, just not as pretty). Ladle into clean, sterilized jars leaving about half an inch of headroom. Seal with hot flats and bands and put in a boiling water bath for 10 minutes. Remove to a cutting board to cool. And get an immense amount of satisfaction as you hear the pings of your sealing jars.