I sat down to write on how to survival cook, but everyone seems to be doing that these days, so, I’ll tell you what I’ve been up to instead. Yes, I’ve certainly been cooking a lot, but I’ve had fun trying to be somewhat creative at the same time.
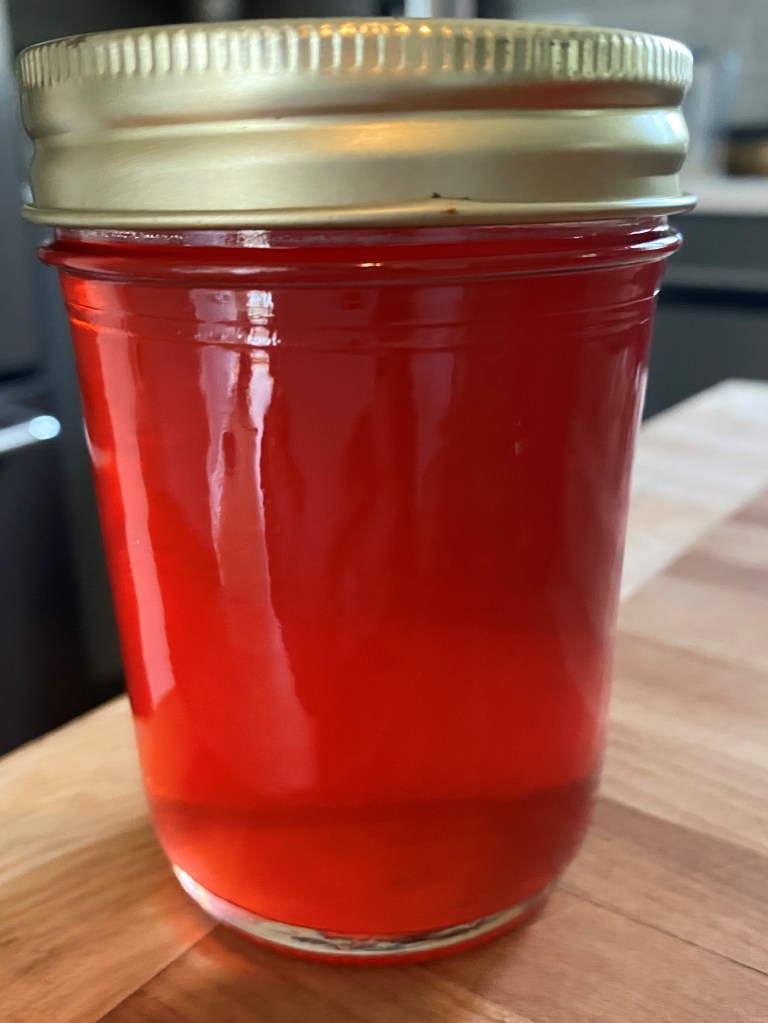
Knotweed Jelly
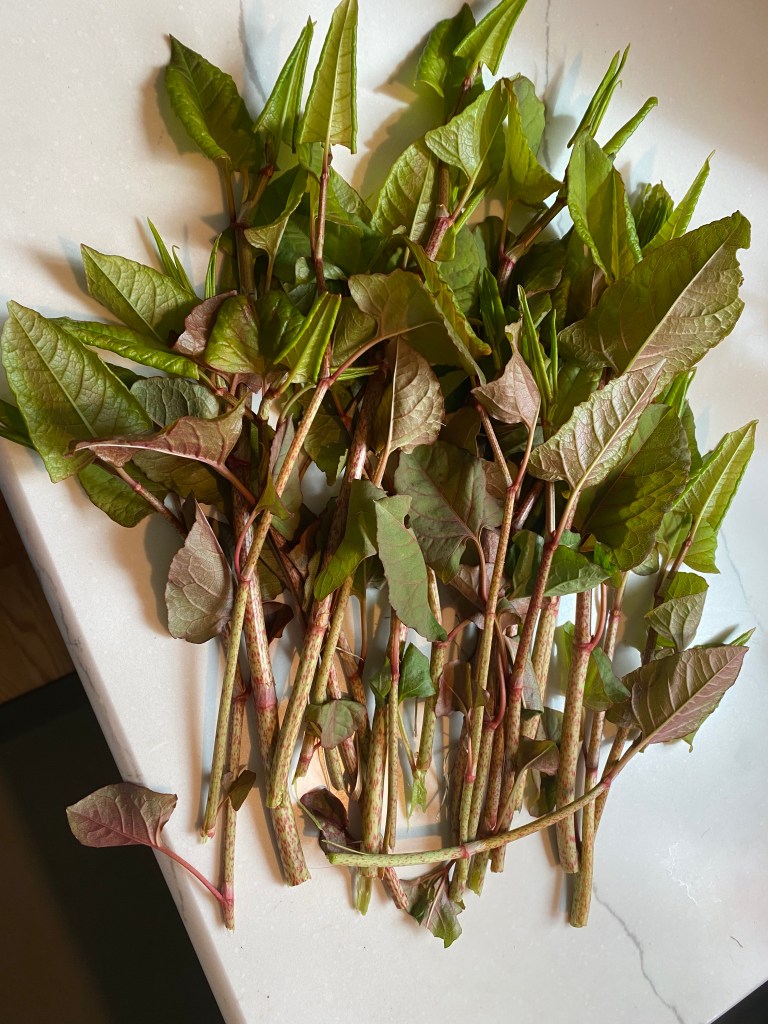
I was out walking the other day and noticed the rampant Japanese knotweed along the trail where I was walking. It’s considered a noxious weed in most states, and is just about impossible to get rid of once it becomes established. You often see it along roadsides in six to eight foot high impenetrable thickets.
I decided to find out a bit more about it, especially since it seems to be taking over a large part of this riverside trail. Not being much of a forager at heart, I was quite skeptical when I read that it is edible. A bit more research from several knowledgeable sources let me know that yes, it is edible, in many forms. Happily, it is supposedly quite an immune-booster, so it’s quite welcome right now when we need healthy immune systems.
It can be grilled, sauteed, stewed, kimcheed (is that word?), and my favorite, turned into jelly. I found a jelly recipe that likens the flavor to that of rhubarb, so I decided to try it. I picked several pounds of young stems (they have to be young to be tender), and after removing the leaves, giving them several washings and roughly chopping, I had eight cups to simmer into juice.
Japanese knotweed
Knotweed has green stems with reddish spots, and often the new leaves are reddish tinged. The stems made lovely pink juice that produced a delicate pink jelly. My eight cups of juice made six half-pints of jelly. After it was finished, I stirred a spoonful into plain yogurt and was absolutely thrilled at how delicious it is. I’m hooked – back to the trail to pick some more.
Fruit Jelly
This recipe can be used for jelly from just about any type of fruit (currants, berries, rhubarb, peaches, apples, elderberries, blueberries). Remember, jelly is made from juice, jam has the fruit in it.
Combine 1 part water to two parts fruit. Eight cups of prepared fruit to four cups of water is a good proportion and will give you about three and a half to four cups of juice. Simmer for ten to twenty minutes, mash with a potato masher and then strain the juice in a jelly bag. Let it drip for a couple of hours to retrieve all the juice. Don’t squeeze or the jelly may be cloudy.
To four cups of juice, add the juice of one large lemon and four cups of sugar. Bring to a rolling boil. When you cannot stir down the boil, add one packet of liquid pectin, bring it back to a boil and boil for one minute while stirring constantly.
Turn off the heat and pour into hot, sterilized jars. Seal with canning lids and process in a boiling water bath for 10 minutes.
Hard times for us all. But I’m so amazed by the indomitable spirit of all of you gardeners and cooks out there. We will get through this and in the meantime, let’s garden. And do yoga and take walks. And cook. Making healthy food for those you love does wonders to mend the soul.
A few tips for cooking now:
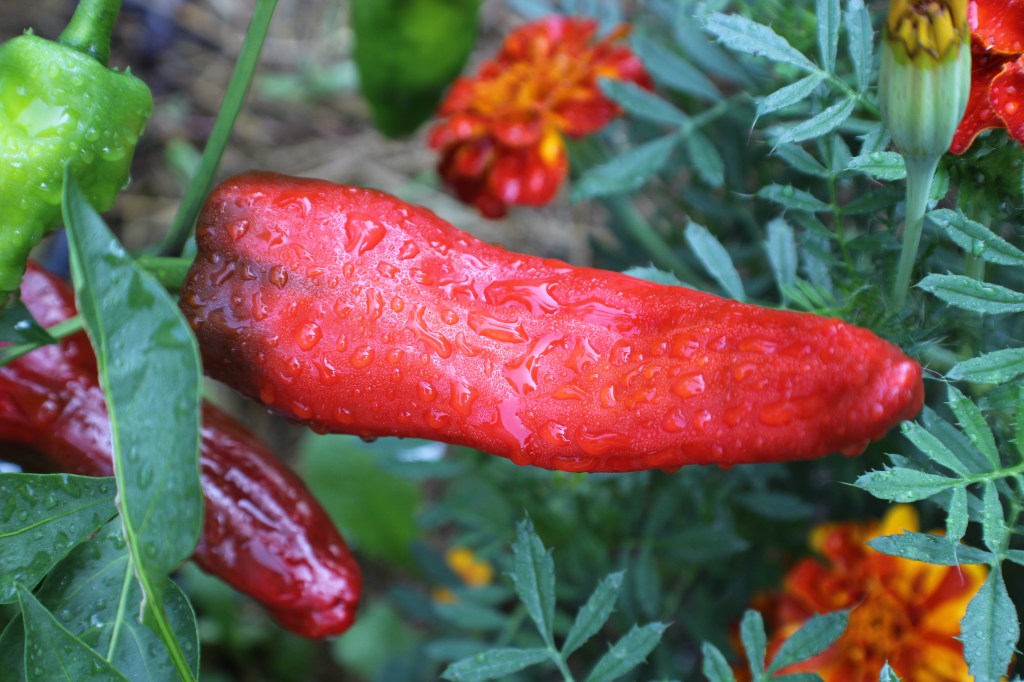
Use lots of chilis – the heat releases the brain endorphins which increase your happiness. Chocolate does the same thing, so maybe brownies are in order. Although I don’t usually do much posting of sweets, perhaps this is the time to indulge.
Katherine Hepburn’s brownies are famous. The recipe is so easy and delicious that it’s become the only one I use. I’ve added my own riff by adding chili pepper to it. So you get the chocolaty goodness topped off by a hint of chili. Not good for your body but definitely good for your heart and soul.
And her words to live by:
Never quit. Be yourself. Don’t put too much flour in your brownies
Katherine Hepburn’s Brownies (borrowed from PBS History)
Photo courtesy of skeez, Pixabay
½ cup cocoa or 2 squares (2 oz.) unsweetened baker’s chocolate 1 stick unsalted butter 1 c. sugar 2 eggs ¼ c. flour 1 t. vanilla ¼ t. (or more) chile flakes Pinch of salt 1 cup roughly chopped walnuts or pecans
Melt butter with the cocoa or chocolate together in a heavy saucepan over medium low, whisking constantly till blended. Remove from heat and stir in the sugar. Whisk in the eggs and vanilla. Stir in flour, salt and walnuts. Mix well. Pour into a well buttered 8-inch square baking pan. Bake at 325 degrees for about 40 minutes till a toothpick inserted in the center comes out clean. Cool completely and cut into squares. The fudgy goodness is hard to slice so use a sharp knife and spatula.
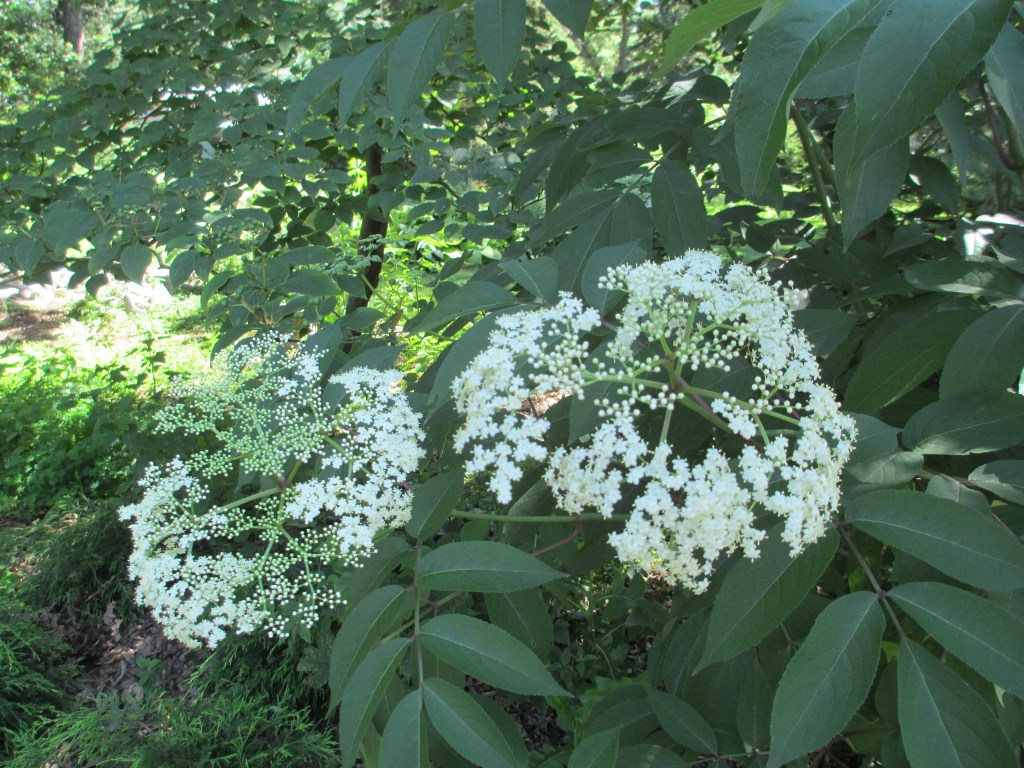
Make plans to make elderberry syrup this year
Elderberry Lime sparkler
Scope out the wild blooming elderberries in the next few weeks and make note of where they are so you can harvest the lucious purple berries in July. Elderberry syrup is simple to make and its immune-boosting qualities make a great reason to use it daily. Elderberry (Sambucus) is a powerful antioxidant and immune system booster, and they grow wild all over the woods and fields. Make your own tonic to keep you in peak health through the winter.
Elderberry blossoms
Elderberry Syrup
Collect and wash heads of elderberries. Clip as many stems off as you can and add the fruit and a very small amount of water to a good sized stock pot. Turn on to a simmer, and periodically mash the berries with a potato masher. After about half an hour of simmering, turn the mashed berries and seed heads out into a cheesecloth bag and let drain over a bowl. When cool, twist the bag squeeze as much juice out of them as you can. Then, either freeze the juice to use later or make your syrup immediately.
Measure into a sauce pan 3 cups elderberry juice and 1 cup honey or other sweetener of choice. Mix and simmer gently until thick. Refrigerate and use a tablespoon in a glass of water daily for health. You can also pour into pint canning jars, leave 1/4″ head room, seal with fresh canning lids, and then process in a boiling water bath for 20 minutes. Store in a dark cupboard.
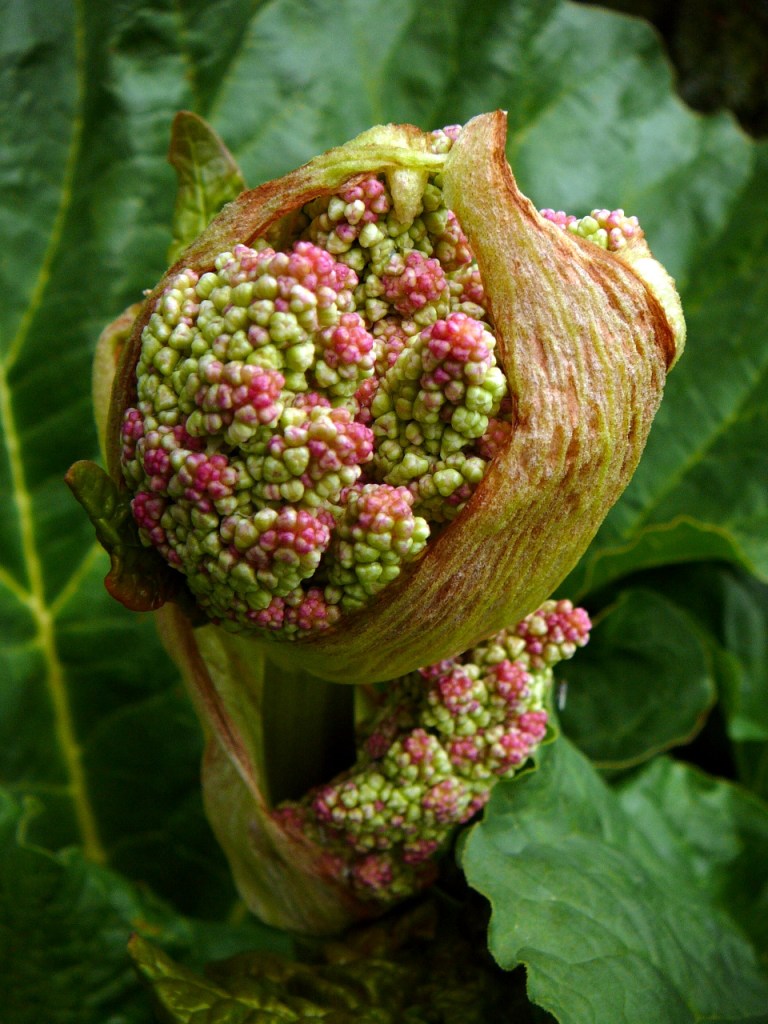
Vegetables that come back year after year? I can’t think of anything more enticing to a gardener than the reward of delicious food with little effort. As I keep trying to ease my gardening load, I’m captivated with the virtues of perennial vegetables.
rhubarb flower
I have a good start on some, but I’m going to add more this year. There’s something so appealing about not having to replant every year. I’ll never give up my annual peppers, tomatoes and green beans, but why not add some other less intense plantings?
Earliest vegetables
Although some vegetables function like perennials, reseeding themselves or being first up in spring after having been planted in fall, there are a few true perennial vegetables that are delicious and exceptionally easy to grow. One of the best rewards is that these vegetables are often the earliest in the garden.
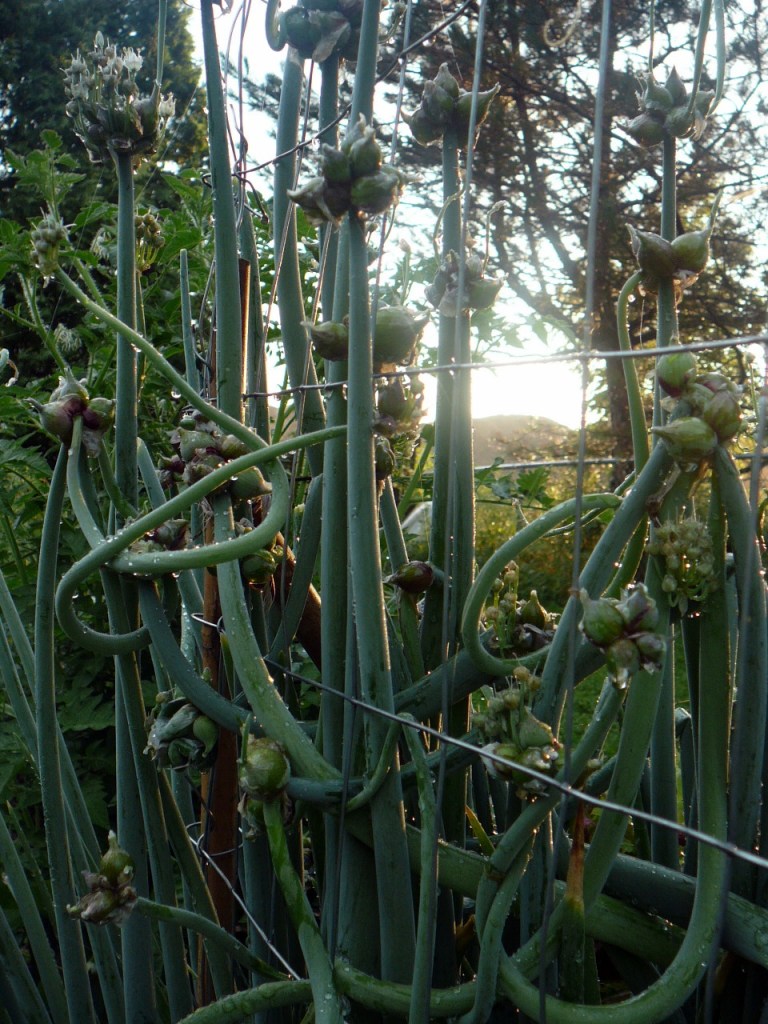
Perennial onions
Perennial onions
One of my favorite aromas in early spring is the combination of moist soil and a freshly pulled spring onion. Also called Egyptian onions or walking onions, they start as small bulbs that send up green scallion-like leaves in early spring, much like any other onion.
The underground bulb becomes tough and woody through the summer, but you can harvest the greens until about midsummer when they become tough. In midsummer the onions send up a flower stalk, and once the flowers bloom, they turn into small bulblets sitting at the top of the plant. If left alone, this flower stalk bends over and “plants” these bulblets.
The small bulblets then send up green scallions in late summer and into fall. They go dormant in winter and begin again the following spring. By bending over to plant the bulblets, the onions spread, thus “walking” to other parts of the garden.
Horseradish
If you’ve never tasted freshly ground horseradish, you are in for a palate teaser. Traditionally it is an accompaniment to robust meats, but try a dollop in a glass of tomato juice or as a side dressing for roasted vegetables.
Horseradish is a beautiful adornment for the garden, although it loves to spread and thrives on neglect. So site it carefully. If you don’t want it to spread, plant the horseradish in a large pot. It will reward you with handsome tropical foliage followed by clouds of airy white flowers. Any time you are ready for a dash of heat and pungency, pull up a crown, break off a piece of root and stick the remaining root back in the ground. You can harvest any time, but the roots do sweeten a bit in the fall after the first frost. Grate the root into vinegar and keep it in the refrigerator for many months.
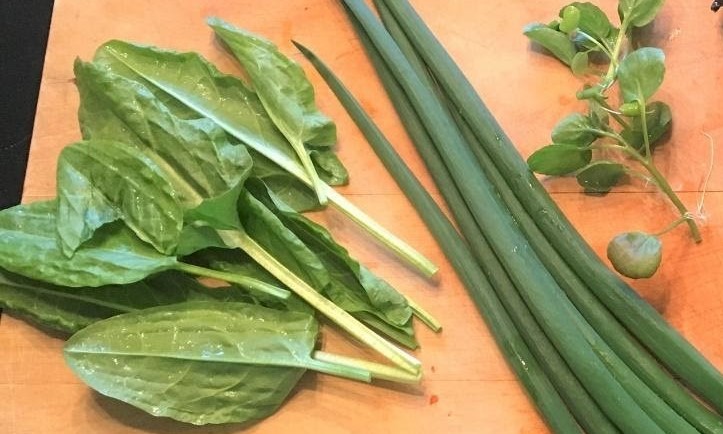
Sorrel
Sorrel and perennial onions
Sorrel greens have the tangy flavor of lemon and can be used fresh in salads or cooked in soups. You can harvest all season although spring and fall are traditionally the best times. The tang comes from oxalic acid in leaves; and the leaves are packed with vitamin C and minerals.
Once established, the only cultural requirements are to keep it watered during drought and divide the plant every three or four years to keep its vigor. Don’t be tempted to fertilize or the leaves tend to lose their flavor.
Asparagus
There is nothing quite like the ephemeral delicacy on your tongue of roasted asparagus. Dress with a sorrel sauce for the epitome of a fresh spring treat. Asparagus is best planted in early spring. The old adage of planting the crowns a foot deep and then filling in soil as they grow has been replaced with some sound research showing that planting about six inches below ground is all they need. The bed needs to be prepared well by loosening the soil and adding compost since an asparagus bed will be in place for twenty to thirty years. Spread the roots on a small mound of soil and cover.
It’s a labor of love because you should not harvest for the first two years because the crowns need time to establish themselves. It’s hard, but you will be rewarded with beautiful thick spears in their third year. As they come up in that third spring, you can harvest until the new spears become smaller and smaller. Stop when they are about pencil-sized and let them go to leaf. The ferny leaves are quite attractive as a backdrop to other flowers, and they turn a brilliant yellow in fall.
Rhubarb
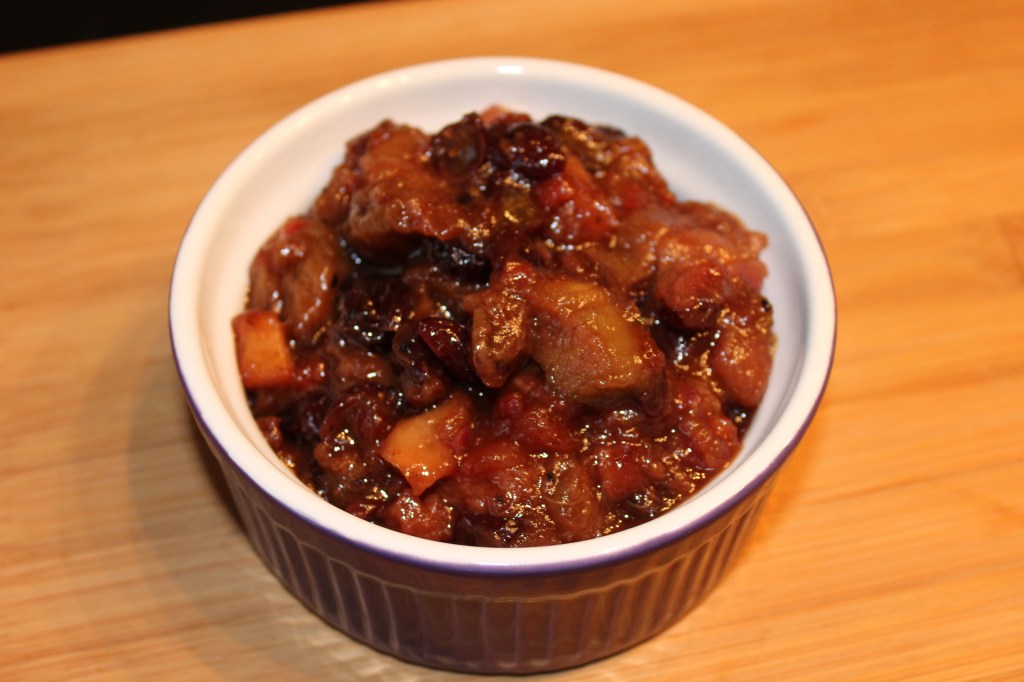
Rhubarb chutney
It’s hard to talk about asparagus without mentioning rhubarb, the other perennial vegetable that is so prominent in early spring. Rhubarb buds actually begin appearing at 40 degrees, and the enormous leaves explode into growth at the first hint of warmth. Rhubarb also takes little care, and the stems can be harvested until mid-summer when new emerging stems become considerably smaller.
Rhubarb bread and strawberry rhubarb pie are traditional favorites, but think about stewing it in maple syrup for a topping for yogurt or ice cream. It makes a great chutney or relish, a refreshing drink or a tangy barbecue sauce.
Sunchokes
Sunchokes (photo by William Brauner)
Jerusalem artichokes or sunchokes are a striking addition to the garden. They take a good-sized bed as they grow to about six feet, with golden sunflower blossoms. The chokes are underground tubers that can be harvested in fall and early winter. You’ll never get them all, and the ones that stay in the ground will sprout the following year. So you plant only one time.
Roasted sunchokes taste nutty and earthy and are a wonderful substitute for potatoes, especially for those whose diet requires fewer simple carbs.
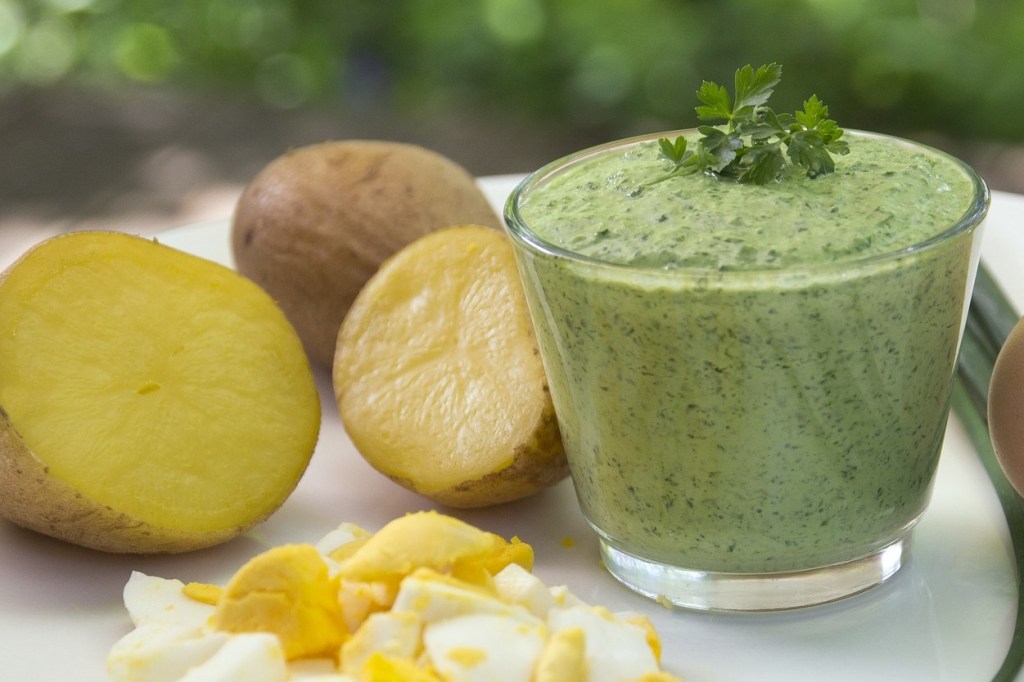
Creamy Sorrel Sauce
Creamy sorrel sauce (photo from Pixabay)
(adapted from More Recipes from a Kitchen Garden by Renee Shepherd)
This lovely light green sauce can be modified in a lot of interesting ways, adding herbs like basil and dill, changing the carriers from mayonnaise to all yogurt, sour cream, creme fraiche, etc. You will love it on salmon, vegetables, potatoes and especially on freshly roasted asparagus.
1 c. any combination of plain Greek yogurt, mayonnaise, sour cream
1 c. fresh sorrel with stems removed and leaves chopped
1 T. soy sauce or 1 t. salt (soy sauce gives it more flavor but you can pump up the flavor with herbs also)
1 clove garlic, minced
Blend (a blender works best to make a velvety sauce) and serve cold.
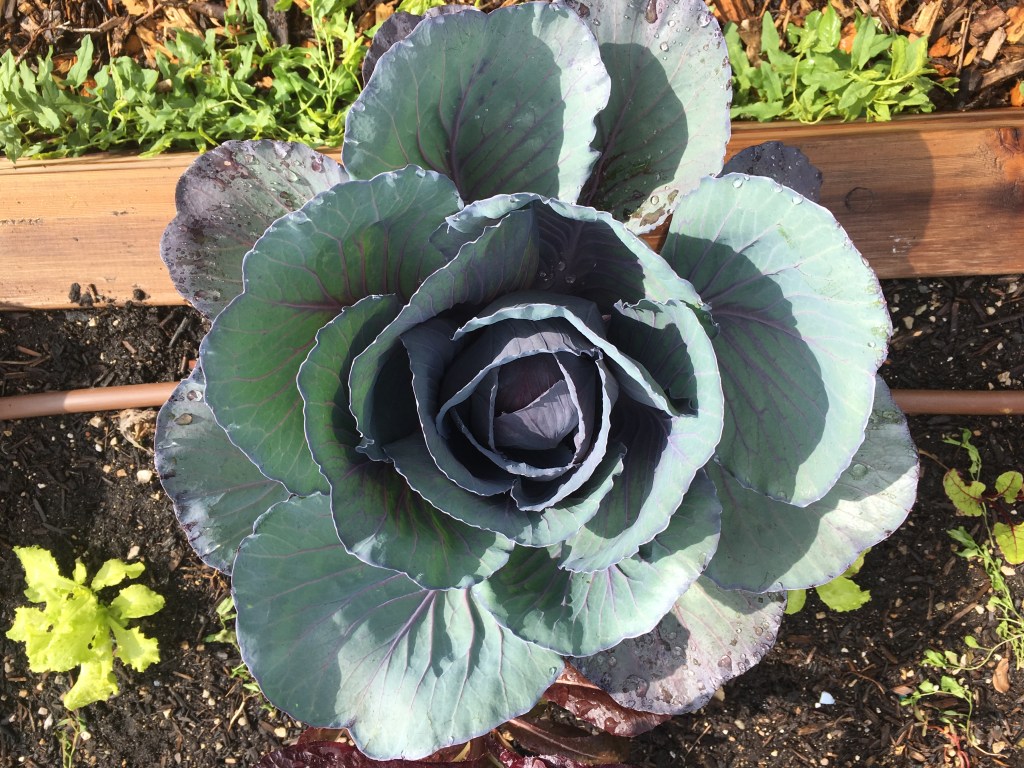
This time of year cabbage and kale are plentiful and nutritious. It’s also time to think about getting those transplants ready for the garden. The cold weather doesn’t bother these hearty (and hardy) plants.
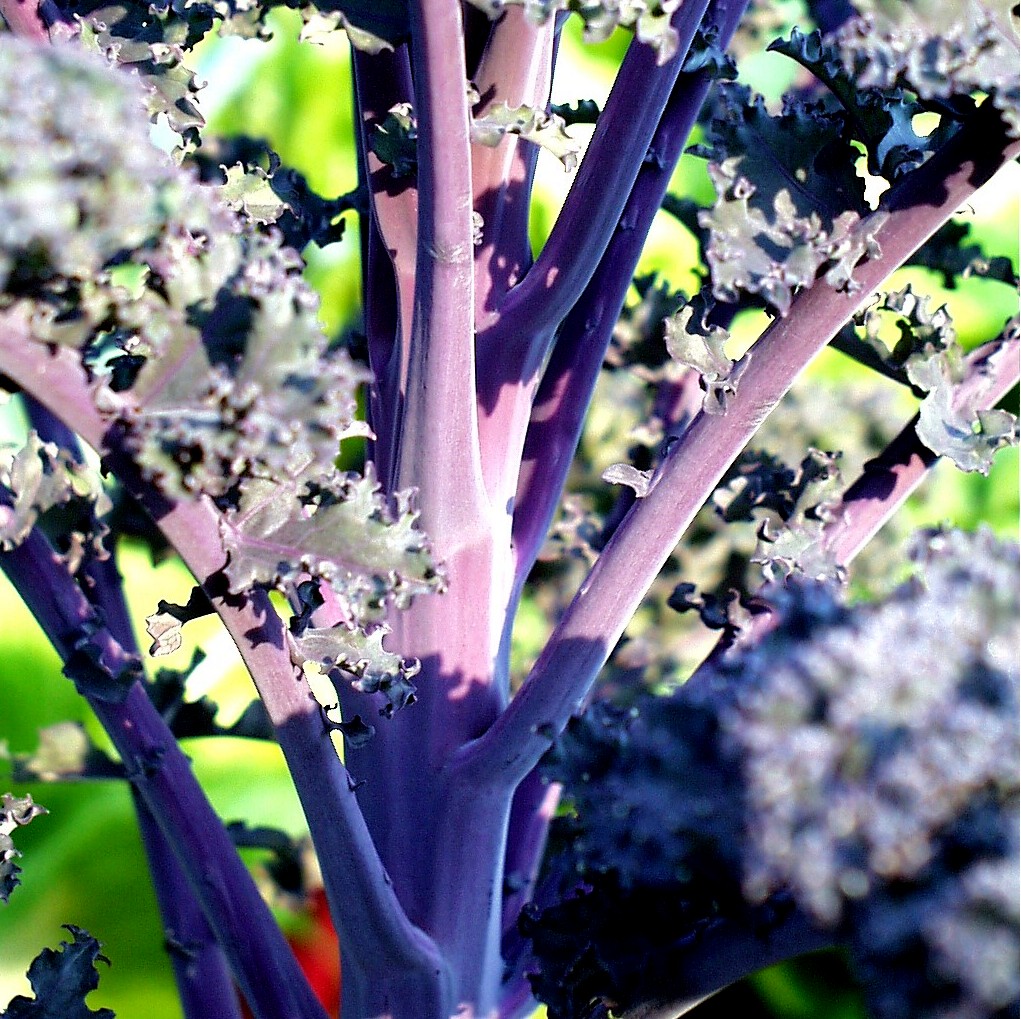
Redbor kale
All members of the cole family are troubled by cabbage moths, so be ready when your transplants go out to cover them with row covers or be vigilant about treating with Bt, a bacterium specific to butterfly and moth larvae (available at most garden centers).
Now to the best part – eating!
Whether Chinese cabbage such as bok choi or napa, round head red or green cabbage, Winterbor, red Russian or laciniato kale, they all can make a wonderful riff on the traditional Irish colcannon.
This true comfort food is simply made with mashed potatoes and cabbage or kale. It sounds unusual, but I’ll guarantee that there’s something magical about the combination of earthy potatoes and sweet cabbage or kale.
Start with mashed potatoes
And as great as it is just as the Irish make it, there are so many other things you can add to it to make it even more delicious. You simply make mashed potatoes as you always have (add cream cheese when mashing for more richness).
Choose your vegetables
Then saute vegetables of your choice – kale, swiss chard, chinese cabbage, traditional cabbage, eggplant, zucchini, broccoli – with some onion and a bit of garlic until slightly tender.
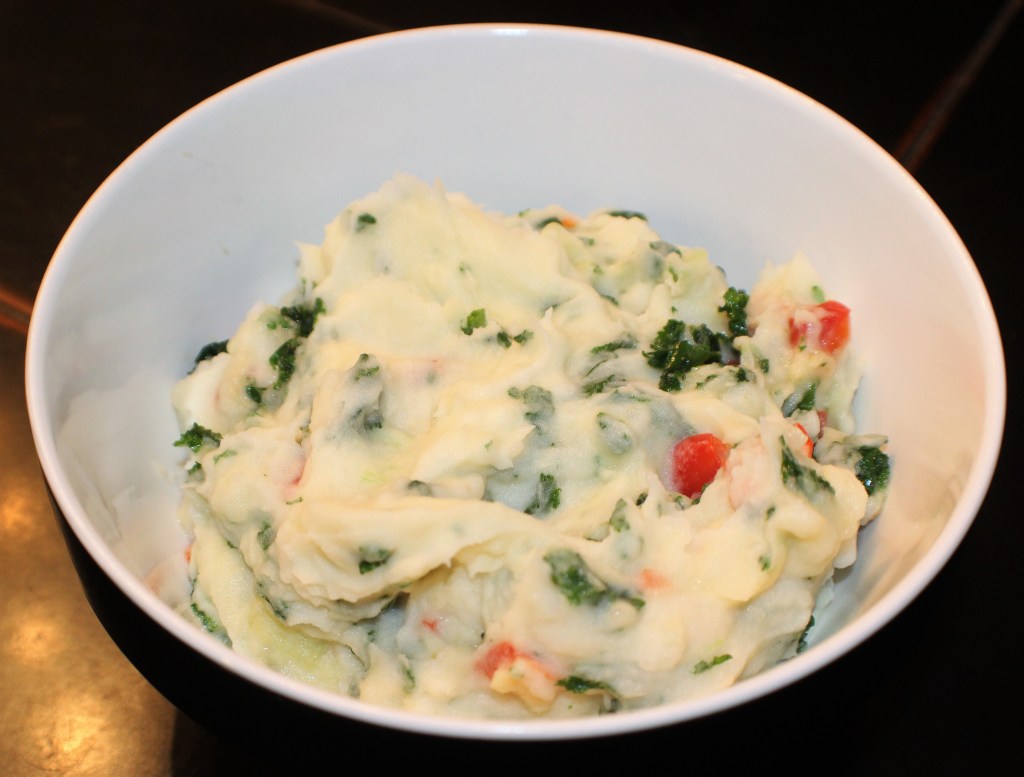
Kalecannon
Mix with the mashed potatoes and bake. It makes a perfect side dish to any main course, and is a delicious vegetarian entree all by itself.
Feel free to add and subtract as your palate desires. You can substitute half the potatoes with parsnips, add carrots or peppers. You can also top the dish with cheddar, gouda or parmesan cheese for a different flavor. If you like, top the dish with bread crumbs or panko before baking.
Kalecannon
Serve six as a side or four as a main dish
4 medium russet potatoes (about two and a half pounds), peeled and cut into chunks. You can use reds or yellow potatoes for a different flavor
2 T. salt (sounds like a lot, but you are salting the water which will give the potatoes just enough saltiness
4 T. butter or 2 T. butter and 2 T. cream cheese
Approximately 1 c. milk or cream
3 c. chopped kale, cabbage, chard, or other leafy green
3 green onions or one small leek, chopped finely
1 clove garlic, minced (optional)
½ c. chopped sweet red pepper or mix in a little hot pepper if you like
In a medium -sized saucepan, put the potato chunks and cover with cold water by an inch. Add salt and bring to a boil. potatoes in a medium pot and cover with cold water by at least an inch. Add 2 tablespoons of salt, and bring to a boil. Boil until a fork easily pierces the potatoes, about 15-20 minutes. Drain well.
Saute vegetables
Preheat the oven to 425. Melt the butter in a saute pan and add the greens. Saute about three minutes. Add the onions or leeks and any other vegetables and cook another minute. Set aside.
Mash and bake
Mash the potatoes with a potato masher or mixer, using enough milk or cream to make them creamy but not runny. Combine with the vegetables and salt and pepper to taste. Smooth into an oiled casserole dish and add cheese and/or breadcrumbs if using. Bake about 30 minutes until the mixture is bubbly. Let stand ten minutes and enjoy!
Oh, how those glimpses into spring taunt us. Days when the sun is shining and the temperature goes above 45 degrees. They are far between right now, but when they do come, my fingers literally get itchy to be plunged into the dirt. Cold though it is, it still feels good.
I’m one of the worst offenders when it comes to jumping the gun on the season, but there are certainly things we can do when we get those softened breezes. Here are a few tips to get you started when you can be in the garden for a couple of hours.
Leave mulch in place
Shredded leaf mulch adds health organics
If you’ve mulched over the tops of your perennials, don’t be too fast to remove it. Wait until the tulips begin to bloom. Remove whatever you can by hand and then use a strong spray of water to remove the rest from the crown. Be sure to keep three inches of organic mulch on the ground around the plant for the growing season.
Prune winter dieback
Yes, you can warm up your pruners! Prune winter dieback while the plants are still semi-dormant to take full use of the sap and nutrient flow in spring. Dead areas of stems will be obvious by their color. Prune just below the dead area, aiming to cut just above an outward facing bud. Also, prune for a pleasing shape.
Cut back ornamental grasses
As soon as the weather permits being outside comfortably, cut back all ornamental grass foliage left on for the winter. Be sure to do this before new growth starts. This will make it easier than trying to sort through the new foliage and will keep from damaging it.
Recycle for the garden
paper pots and cardboard rolls
Start recycling for the garden. Save paper towel, bathroom tissue or gift paper rolls and cut into 3-inch lengths to use for seed starting or as collars around early transplants to prevent cutworm damage. Make a mini-greenhouse by bending coat hangers into arches to fit in a seedling flat. Cover with plastic.
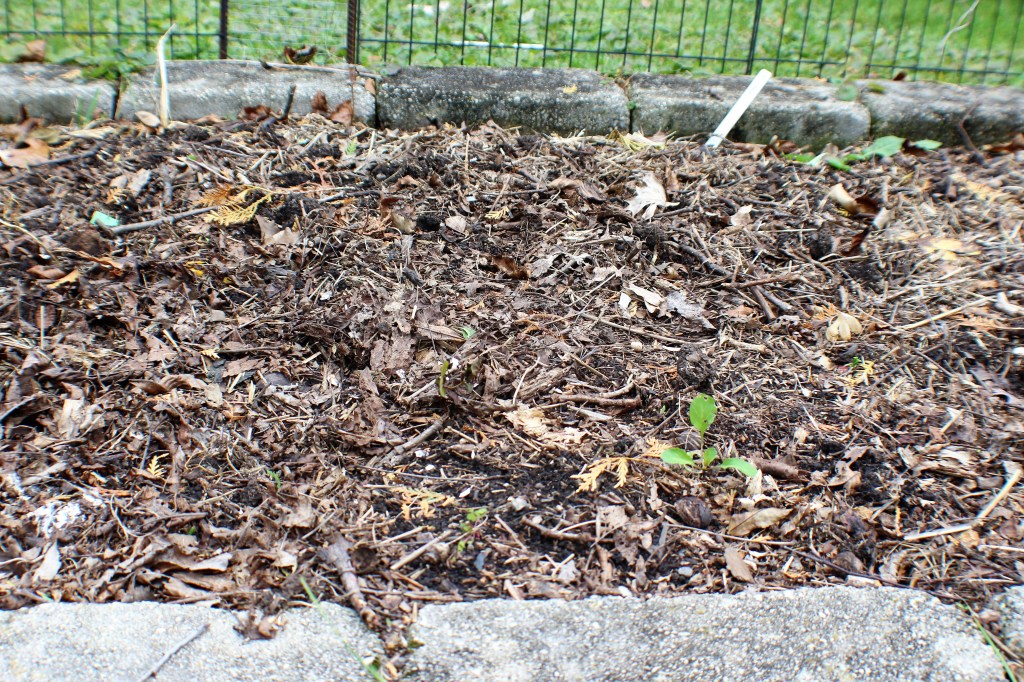
Leave garden debris in place
No need to remove dead foliage
Even though spring clean-up feels really good, don’t be too eager to rake the area under shrubs and groundcovers clean of leaves and organic debris. Nature doesn’t do this, so mimic the woods and leave the natural mulch in place. This not only helps the health of the plants by providing nutrients as the materials decompose, but it also gives birds an excellent hunting ground. And the plants will come up through the mulch just fine.
Set up your cold frame
There’s no need to have a fancy set-up. Simply placing bricks, cement blocks or even hay bales and putting a discarded window across them will give you a superb planting spot for early vegetables. There is absolutely nothing quite as sweet as fresh spinach, especially when coupled with the earliest of perennial onions. Make sure to give it a south or southeast exposure with some wind deflection.
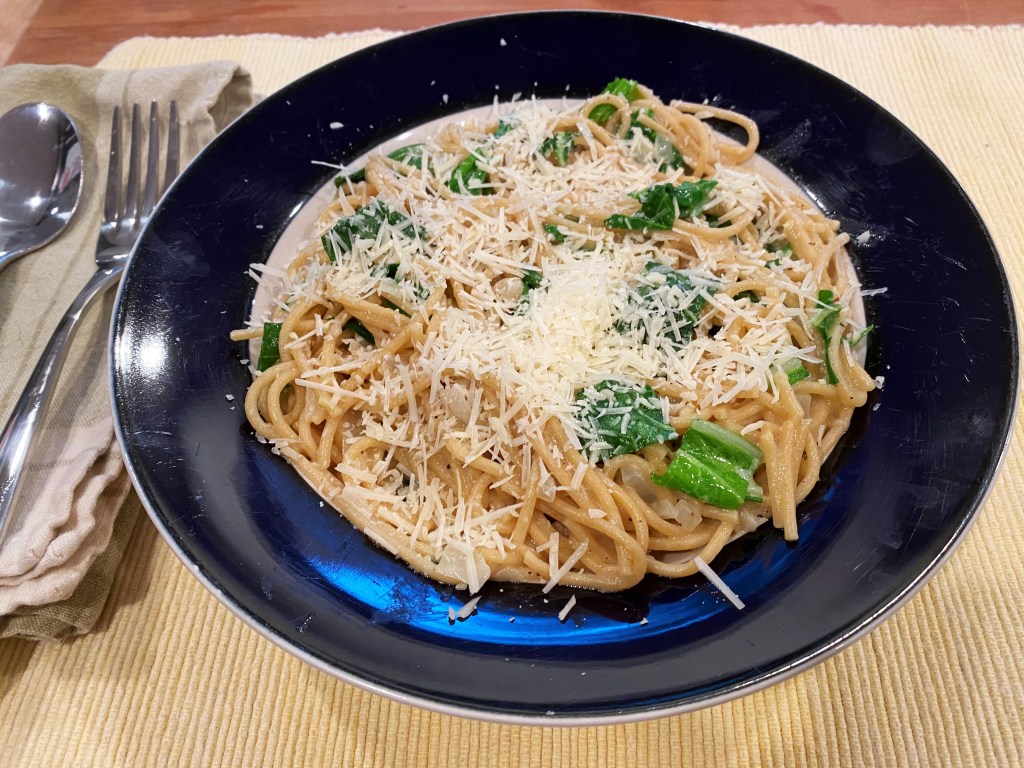
Spinach pasta
A deliciously easy recipe for early spring spinach (or any green)
1 tablespoons extra-virgin olive oil
½ cup finely chopped onion
3 cloves garlic, minced
½ pound whole grain spaghetti
Salt and pepper
1 tablespoon butter
½ pound fresh spinach, coarsely chopped
Red-pepper flakes, to taste (optional)
½ T. fresh lemon juice
½ c. grated Parmesan, Asiago or smoked gouda cheese
Cook pasta in salted water to al dente. Drain, reserving one cup of the pasta water.
Saute onion and garlic in oil until tender but not caramelized. Add pasta, reserved cooking water, butter to the onion and garlic. Cook over low heat, stirring constantly until the sauce thickens, about 5 minutes. Add spinach and red pepper, stirring until the spinach wilts. Add rest of ingredients, stirring until the cheese begins to melt. Season to taste. Serve with more cheese if desired and garlic toast. Enjoy!
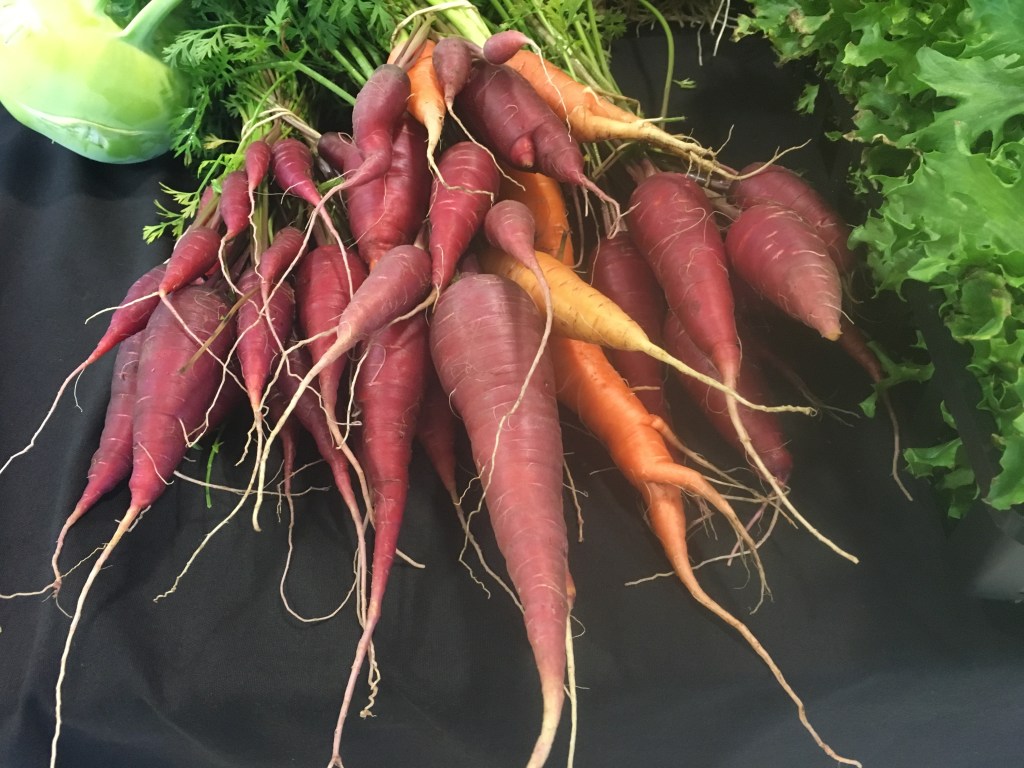
It seems that when we are sequestered indoors, our bodies yearn for warmth, both internally and externally. We naturally crave those earthy flavors of root vegetables such as carrots, beets, parsnips and even rutabagas. So, plan a visit to the winter farmers’ market or raid your own root cellar for any combination of delectable root vegetables. Cook up your roots into a rich soup (with the added sweetness of a butternut squash), dish up a bowl, cut a slice of rustic bread, and pull your chair up next to the fire.
Start planting roots crops
It’s time to start planting root crops. They are perhaps the easiest of vegetables to grow. Cool season crops, they bracket the garden season or can be planted multiple times for yield all season long. You can put the seeds into the garden as early as possible. The seeds will not be harmed even by heavy frost, so as soon as the thaw starts, get them out there. If your garden is prepared, you can even cast the seeds on the snow to get the earliest start as soon as they hit the soil.
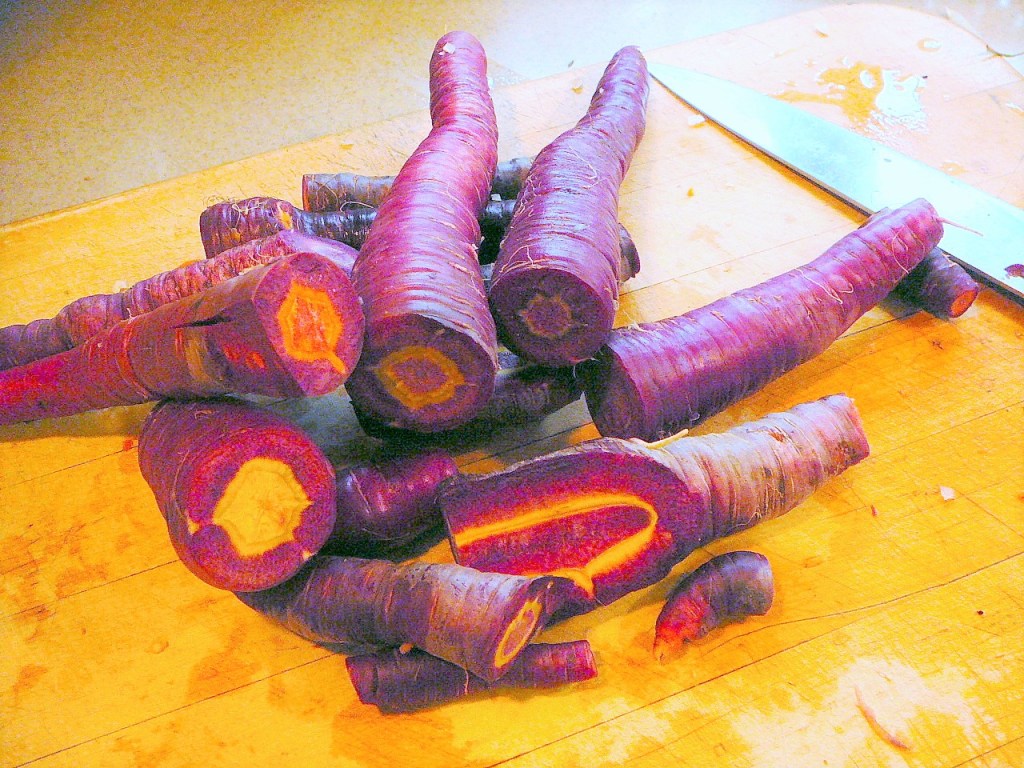
Purple Haze carrots
Don’t forget fall planting
At the other end of the season, start planning the fall crop in July. Carrots and beets go in around the middle of the month, turnips the first week.
Easy to grow
Root crops grow well in any spot in the garden that receives six to eight hours of sun. The most critical element to healthy growth is preparing the soil deeply to have good tilth, with nothing to impede the growth of the roots. We’ve all seen carrots with forked roots – this usually is due to the tender root hitting something it cannot grow through so it moves off at an angle. The soil should be of average fertility and the plants should be mulched to keep the soil moisture even.
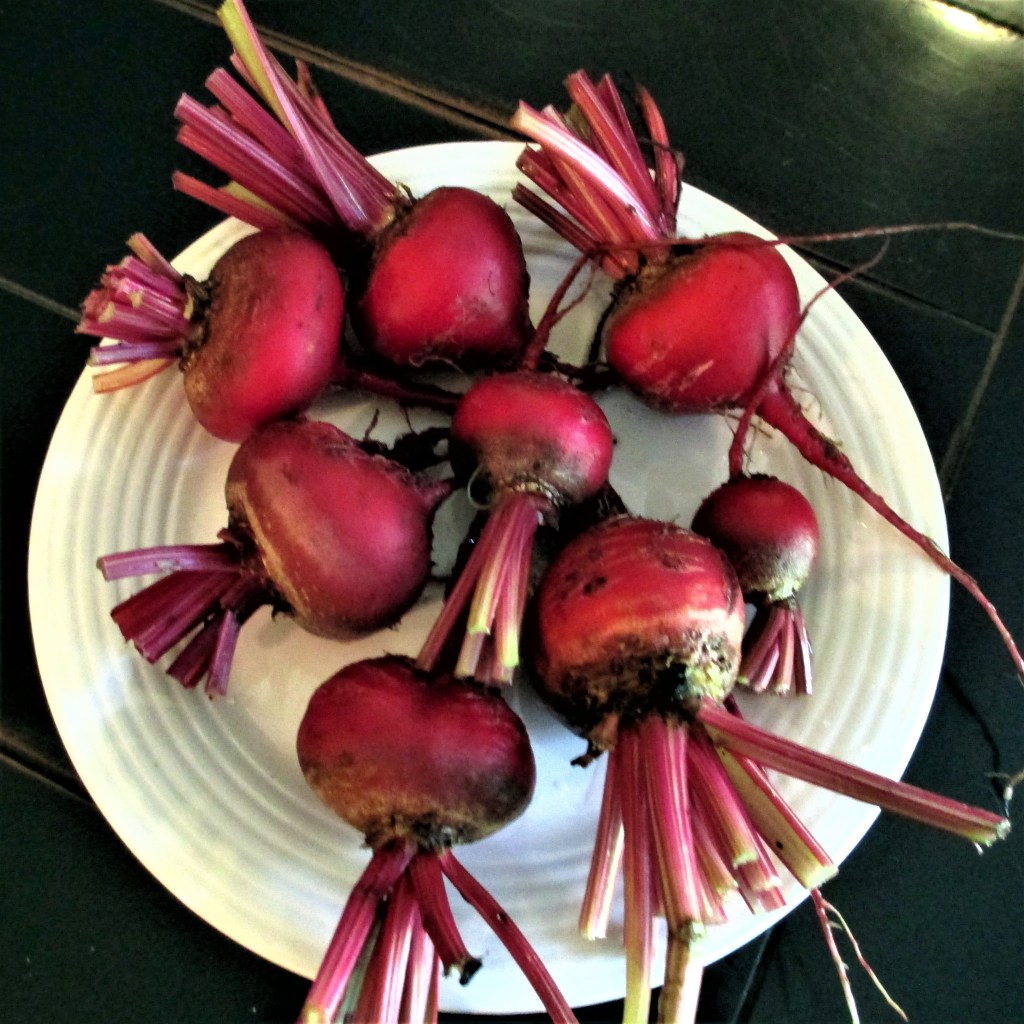
Chioggia beets
Plant frequently
Planting every two or three weeks will keep you in carrots and beets all season. My favorite beet is Chioggia, an Italian beet that is creamy white or pink with dark rings. The best feature is that these beets will stay tender all season, not becoming woody as some beets do when left in the ground.
Spiralized Chioggia beets
And now for the soup:
Winter Root Vegetable Soup
Root vegetable soup
You really can use any combination of vegetables. Vary the flavors with different combinations and add herbs to give you further nuances of flavor. This soup is creamy, savory and slightly sweet, an amazing comfort on a cold winter evening.
Use one cup of vegetables for each serving. This recipe serves 6-8 although you can cut it half easily. It also freezes well.
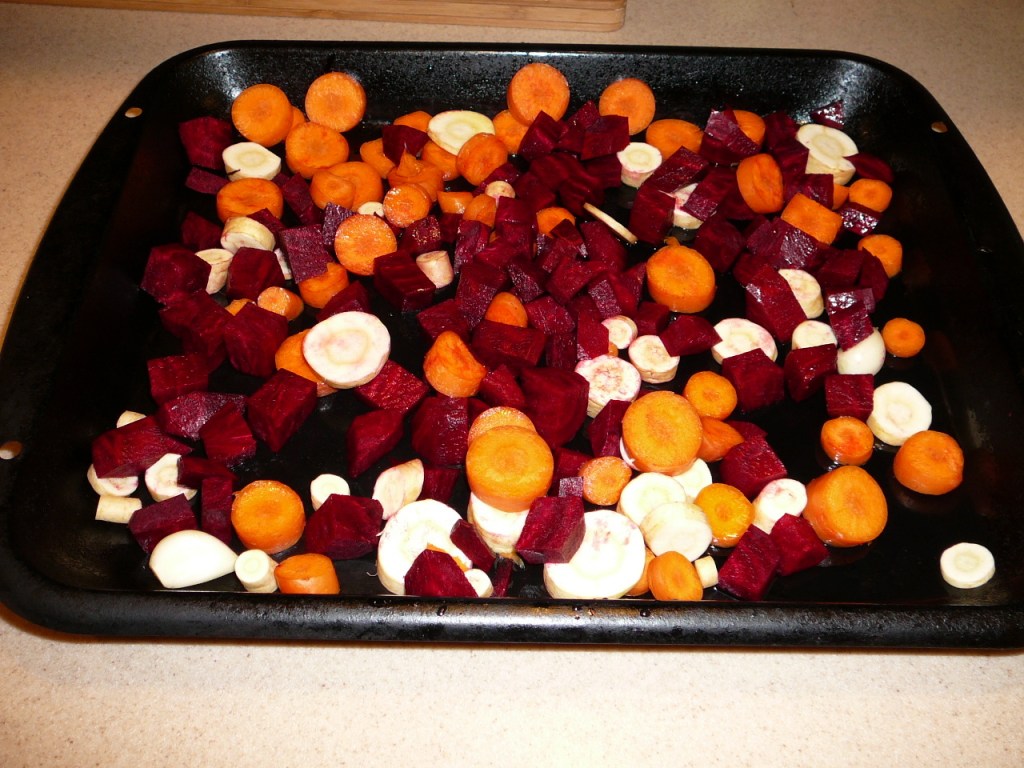
Beets, carrots and parsnips ready for roasting
6-8 cups root vegetables (any combination of carrot, beet, parsnip, rutabaga, turnip, salsify, celery root, sweet potato, butternut squash) cut into ½ inch pieces
2 cloves garlic
¼ c. olive oil
1-2 t. salt as needed
¼ – ½ t. fresh ground black pepper (to taste)
1 small sweet onion, diced
2 stalks celery, diced
1 quart chicken or vegetable broth
½ t. dried or 1 T. fresh herbs of choice – basil, oregano, thyme, rosemary
Preheat oven to 400 degrees F. In a low-sided broiler or jellyroll pan, place vegetables and drizzle with about two tablespoons of olive oil. Roast in a preheated oven for about 30 minutes, stirring occasionally until all vegetables are tender when pierced. Sprinkle with salt immediately upon removing from the oven.
Roasted vegetables ready to puree
While vegetables are roasting, in a large pot over medium heat, saute onions and celery in the remaining olive oil, stirring until the onions are translucent. Add pepper, herbs and stock. Bring to a simmer. Stir in roasted vegetables and heat through. Puree with an immersion blender or in small batches in a food processor or blender. If soup is too thick, thin with water, more broth, or creamy it up with half and half or coconut milk.
Ladle into bowls, grate fresh pepper on top and drizzle with fruity olive oil. Serve with crusty, rustic bread and a crisp cabbage salad.
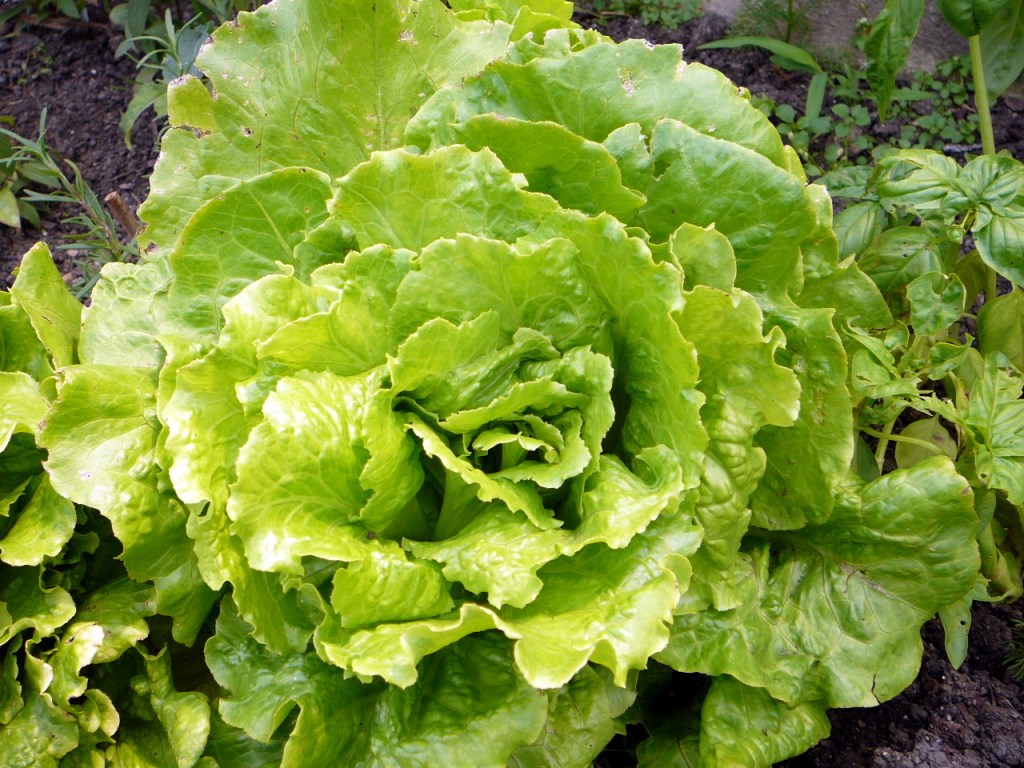
I had a dream about planting lettuce last night. Yup, it’s time to start thinking about the garden.
Batavia lettuce
I love planning the garden, especially since I’m growing my own transplants this year. Planning is such a spirit lifter and the enthusiasm sometimes makes it hard to keep plant numbers in check.
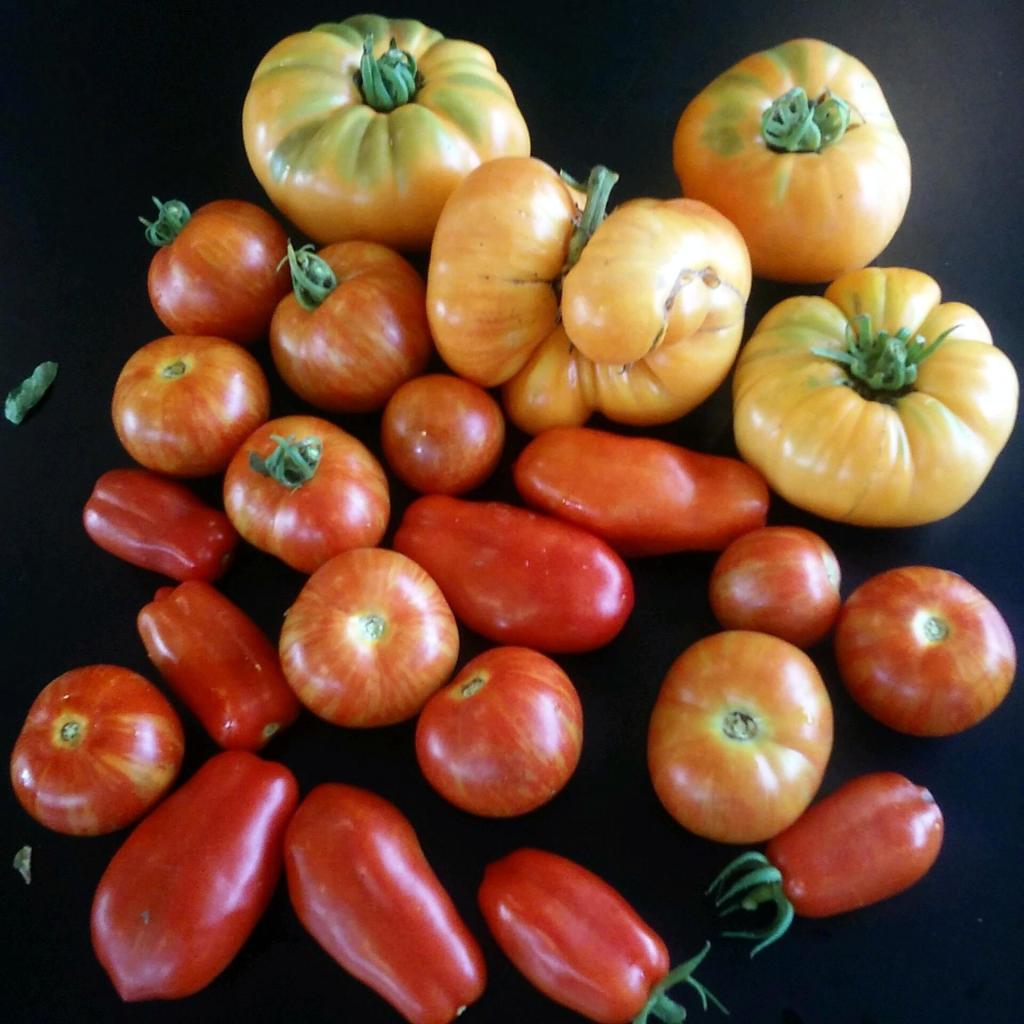
Too Many Tomatoes
I spoke with a gardening friend who said she grew 25 varieties of heirloom tomatoes last year. So, I asked why – could she really use that many tomatoes? Nope – she just wanted to see if she could do it. I get it. I don’t need 25 tomato plants, but there are so many great varieties I want to try. How can I just start one or two of each?
Heirloom tomatoes
Slow Gardening
I’m trying really hard to keep my slow gardening mantra in mind. Slow gardening doesn’t mean lazy gardening although it can certainly apply to those of us who don’t want to spend every waking moment worrying about and tending to the garden. But it’s also a way to evaluate what I really want and what I can actually use.
Starting more than I need is okay as long as I have somewhere to place them. I mean with friends. It’s also insurance against losses, should the inevitable happen.
Seeds started!
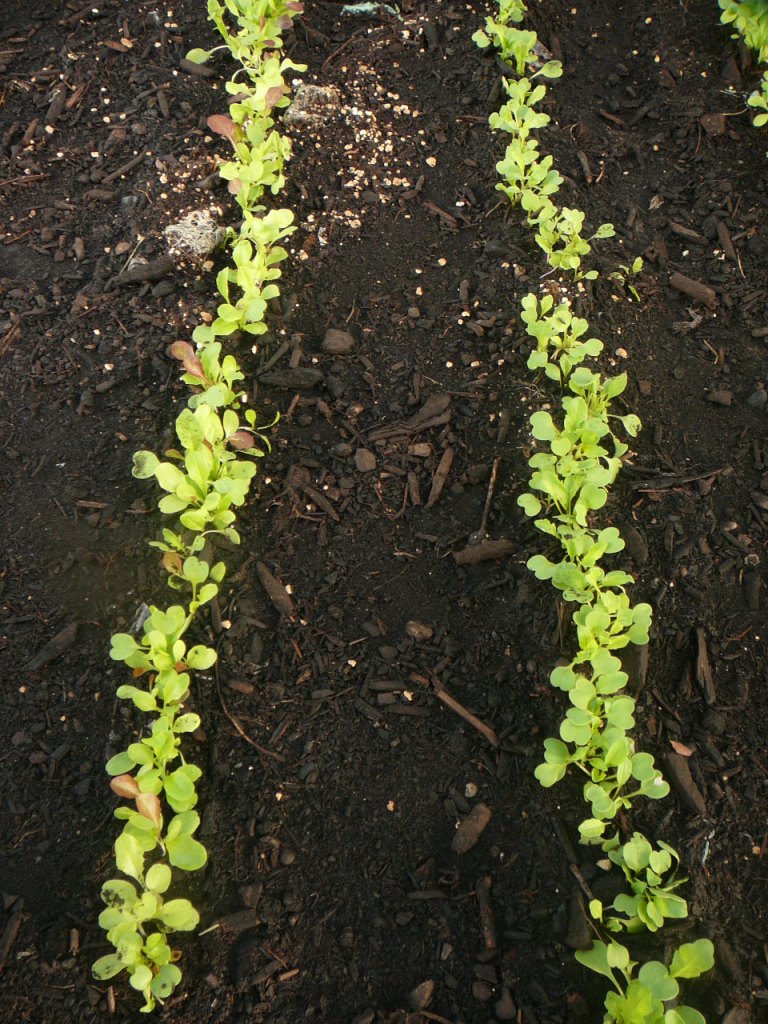
So seeds have been ordered and my calendar is up to date. It’s actually time in my area to start broccoli, eggplant, chard and pac choi next week. Lettuce, spinach and peas have been planted outdoors.
Lettuce seedlings
Cook Your Lettuce
And did you know you can cook lettuce? Grilled romaine is delectable and leaf lettuces can be sauteed just like any other greens. Who knew?
Grilled Lettuce Salad
Grilled romaine lettuce salad
smoky on the outside, cool and crunchy on the inside
1 small head of romaine other tight-headed lettuce
1 T. bleu, feta or goat cheese
olive oil
balsamic vinegar
Preheat grill or grill pan. Slice lettuce into halves, keeping the core intact to hold the leaves together. Drizzle lettuce halves with olive oil and grill approximately 2-3 minutes a side, just long enough to begin wilting and starting to char. You can serve immediately with more olive oil, balsamic vinegar and cheese or you can chill the lettuce and then chop and serve later with a caesar dressing.
Pesto over hot pasta couldn’t be a simpler, more healthy meal (or over rice or on a baked potato). Traditional Italian pesto is made of basil, pine nuts, olive oil, garlic and parmesan. It’s delicious, but at the risk of offending my Italian cook-friends, I’m going to give you some riffs on traditional pesto, to make use of whatever is harvestable.
Pestos are infinitely adaptable
Pestos can be adapted to just about any flavor you like, and will give you a good shot of serious vitamins when added to soups, stews or pastas. I’ve also heard the term “green smash” used for a pesto-like sauce made with herbs which is a beautifully imaginative way to present it.
Greens make great pesto
Greens such as kale, beets, Swiss chard or Asian mizuna, are prolific producers, so you will almost always have more greens than you can eat in summer. One of the easiest ways to preserve them for winter eating is in pesto.
Chard pesto ingredients
Simply wash and stem the greens, and toss in the food processor with a couple of cloves of garlic, some olive oil, a handful of roasted nuts (pine, almond, walnut, pecan, pistachio), fresh basil or other herb of your choice, salt and pepper. Punch up your pesto with roasted peppers, sun dried or fresh tomatoes, roasted winter squash or roasted carrots.
Prepare for the freezer
Puree the mixture and put in a plastic freezer bag. Squeeze out all the air and flatten the bag to freeze. This way, you can simply break off chunks to use without having the thaw the entire bag. Alternatively, you can freeze in ice cube trays or single portion bags. Don’t add cheese until you plan to use the pesto – it doesn’t freeze well.
Toss with pasta, rice, potatoes
For a quick lunch or dinner, thaw the pesto and toss with pasta or rice and add a generous helping of high-quality grated parmesan, romano or asiago cheese. You can embellish with chopped tomatoes, fresh slivers of red onion or anything else that catches your eye. Add silken tofu or plain Greek yogurt to any pesto when serving for added nutrition.
I’ve listed a classic pesto recipe below but check out the recipe page for chard, red pepper and garlic scape pesto recipes.
Classic Pesto
3 cloves garlic
2 c. fresh basil leaves
¼ c. nuts
1 ½ t. salt
¼ t. pepper
½ cup olive oil
3 oz. Parmesan
Combine all ingredients except oil and cheese in blender or processor. Add half the oil. Process while adding other half the oil. Stir in cheese as you serve.
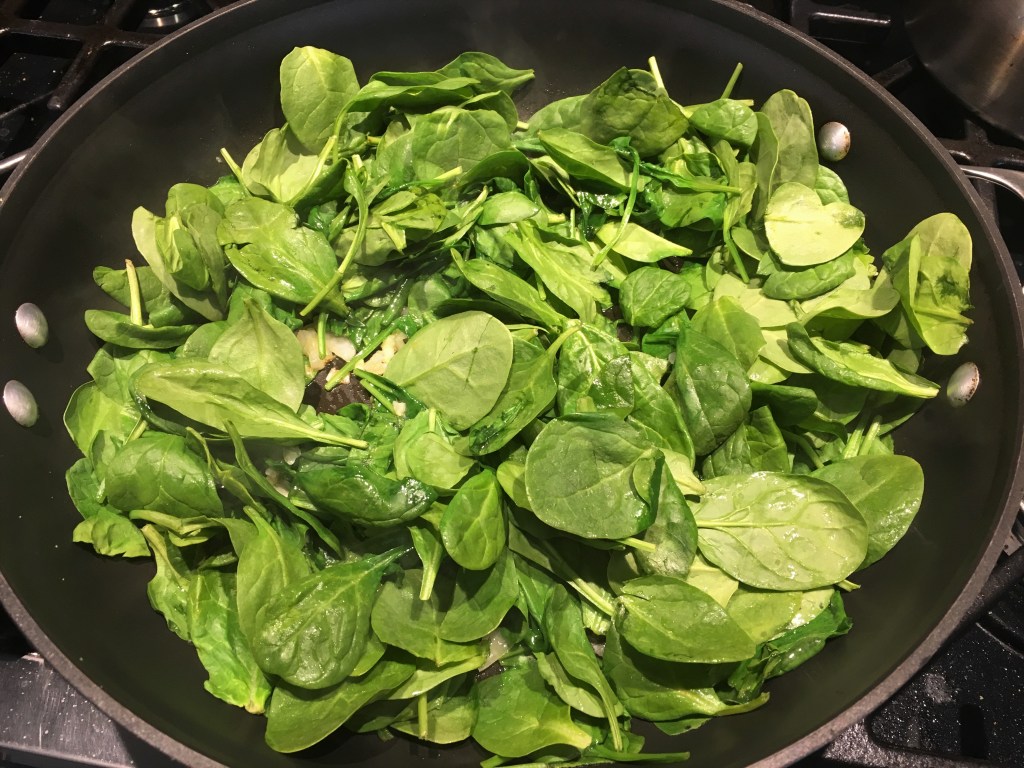
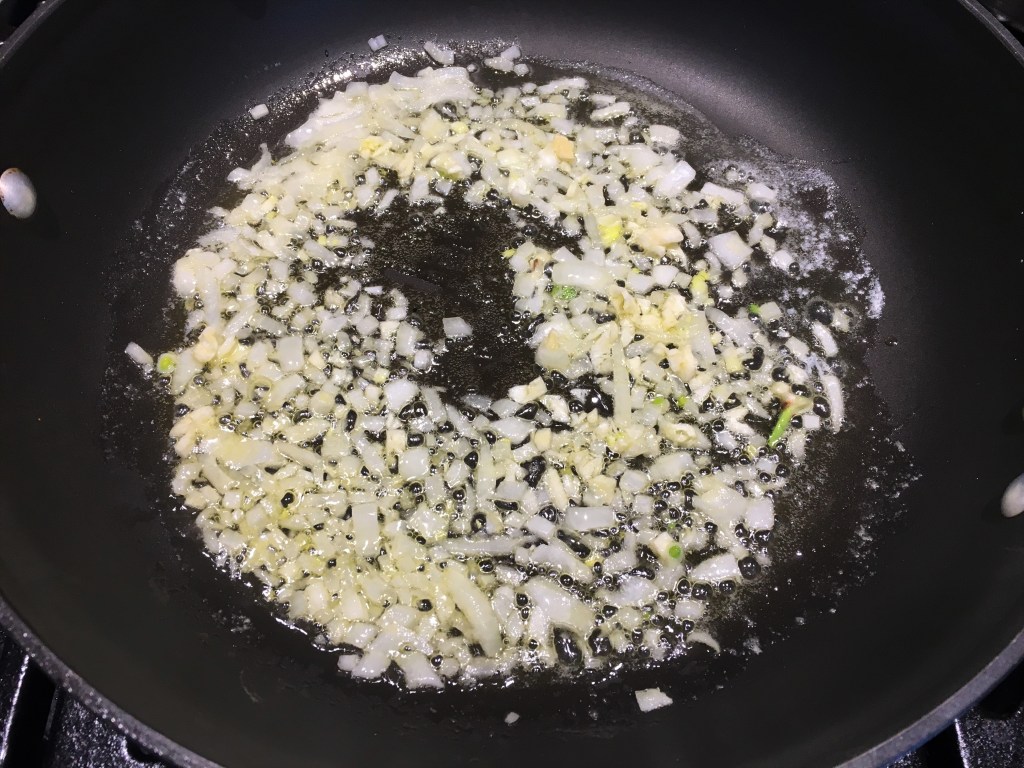
You can certainly have your lavender (I love it too) and your patchouli. But when I need scent to make me feel better, I turn to the kitchen. There is nothing as uplifting as the aroma of sauteeing onions in butter. It smells delicious and reminds me of happy times in my grandmother’s and mother’s kitchens. It is the great beginning for just about anything savory and tongue pleasing.
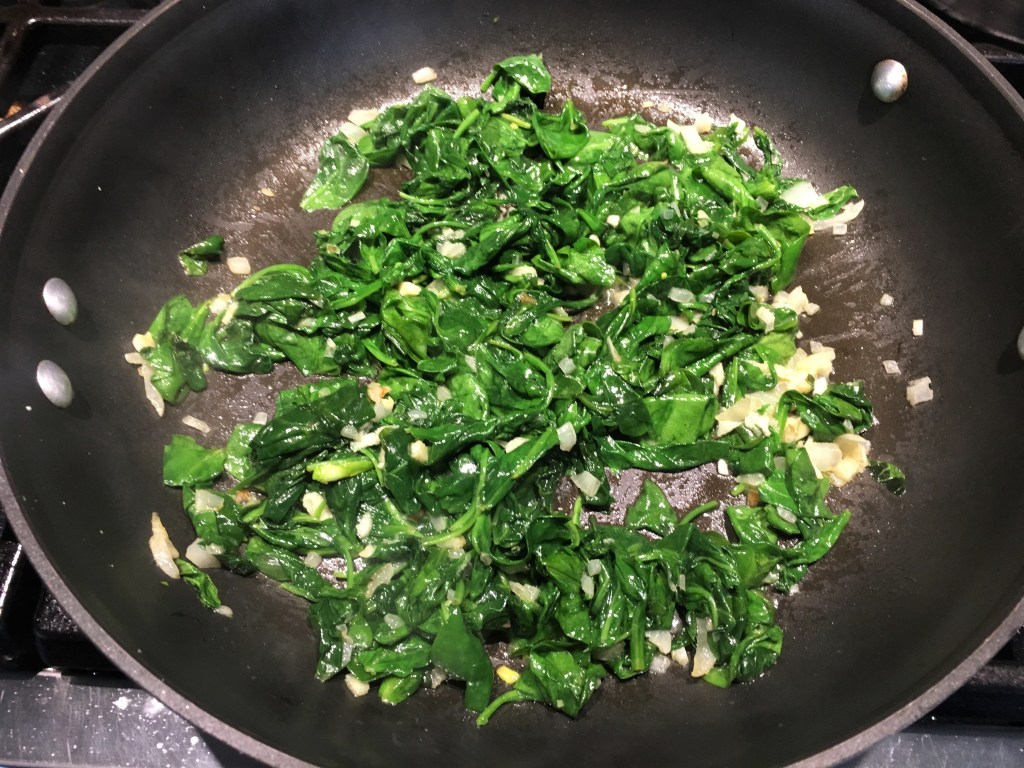
Spinach with onions
Minced onion and garlic sauteed in a little olive oil and a touch of butter brings a simple green like spinach to something sublime. This is a wonderful dish all by itself, but can also be added to soups, stews, risotto, eggs………only limited by imagination.
One of my favorite breakfasts:
Spinach and Avocado Toast
(called tartine if you want to be fancy – a tartine is a slice of bread with a sweet or savory topping.
1 medium bunch spinach, coarsely chopped
¼ onion, chopped finely
1 T. olive oil
Salt and pepper to taste
2 slices whole grain bread
Grainy brown mustard
2 oz. your choice of cheese
½ avocado (optional)
spinach toast with avocado and sriracha sauce
Sriracha (optional)
Saute onion and spinach in olive oil until the spinach wilts. Salt and pepper to taste. Toast bread, spread with mustard and pile on spinach and avocado if using. Top with cheese. Broil until cheese melts.
Have you ever been to a potluck or party where bean dip or hummus was not standard fare? Kick these healthful dips up a notch by adding all manner of vegetables and seasonings – a great chance to use your imagination.
Serve traditional hummus in non-traditional ways
Traditional hummus is made with chickpeas and tahini, but you can make a delectable spread or dip with absolutely any type of bean and just about anything added to it. Vary your recipe with seasonings as well as what you serve it on. Try it spread on toasted baguette slices, topped with chopped tomatoes, garlic and basil as a riff on bruschetta. Or simply try it on a sandwich in place of mayonnaise. Delectable!
If you’re willing to experiment:
If you’re willing to experiment!
Puree 2 cups cooked garbanzos, cannelini beans, even black-eyed peas. You can use tahini or any other type of butter such as almond, walnut or pecan butter. Peanut butter makes it a bit strong, but still good. Add roasted peppers, cooked pumpkin, spinach, chard and season with garlic, cilantro, parsley or thyme. Season with sriracha, chipotle tabasco or other pepper for a kick. Leave it somewhat chunky or puree until smooth, according to your taste.
The basic recipe for hummus (substitute at will!):
1 can chickpeas, rinsed and drained or 2 cups freshly cooked
1/2 c. tahini
1 T. lime juice
1 t. cumin
1 clove garlic
1/4 t. cayenne
Olive oil
Salt to taste
Blend all but the olive oil. Gradually add enough olive oil to make it creamy but not runny. Season with salt to taste. Refrigerate for the flavors to blend. Serve at room temperature with toasted pita chips, pretzels or sliced cucumbers, peppers aand carrot sticks.
Other combinations:
Black beans with sour cream, cumin, garlic and chopped chipotle chiles in adobo. Serve with tortilla chips or toasted corn tortilla wedges
White beans with almond butter, roasted peppers, roasted garlic. Serve with pita chips or toasted baguette slices.
Black-eyed peas with crumbled crisp bacon, sweet onion and sweet peppers. Serve with cornbread squares
To traditional hummus, add chopped roasted red peppers, a couple of tablespoons of cooked pumpkin or butternut squash or sun dried tomatoes.


You must be logged in to post a comment.